参考视频:
【【雷】Hugo + Github免费搭建博客,并实现自动化部署】 https://www.bilibili.com/video/BV1bovfeaEtQ/?share_source=copy_web&vd_source=6b5118a5d5b29a140a6c9241c8cdd612
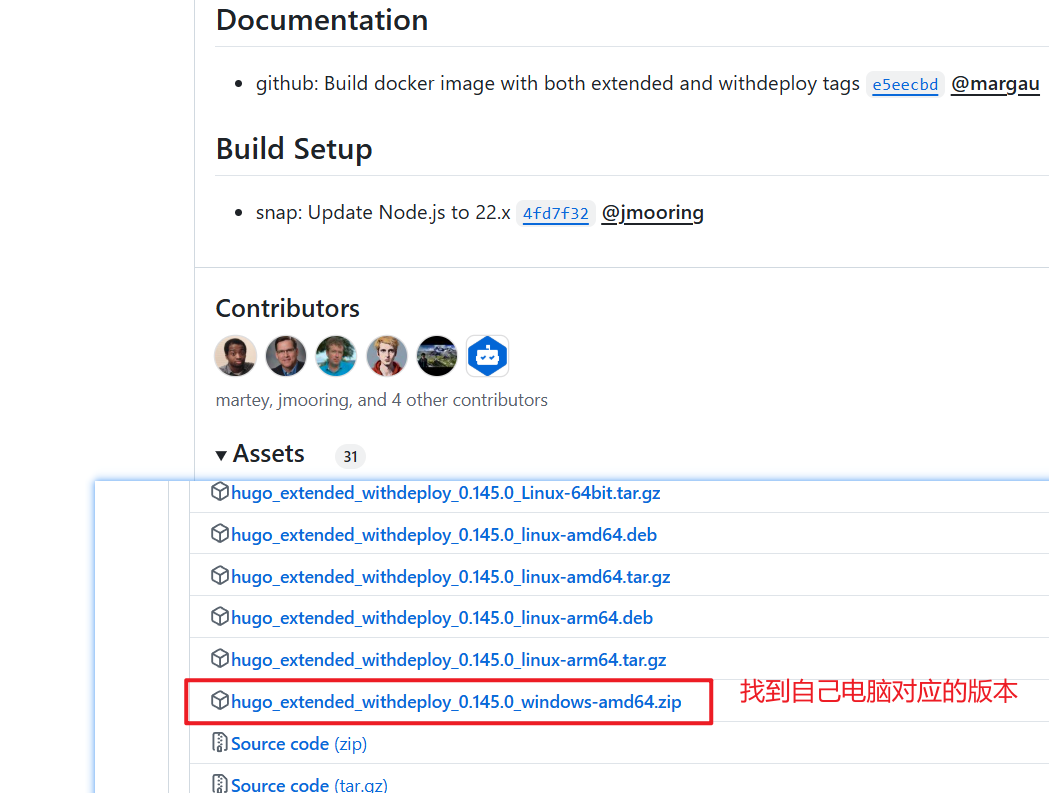
下载HUGO
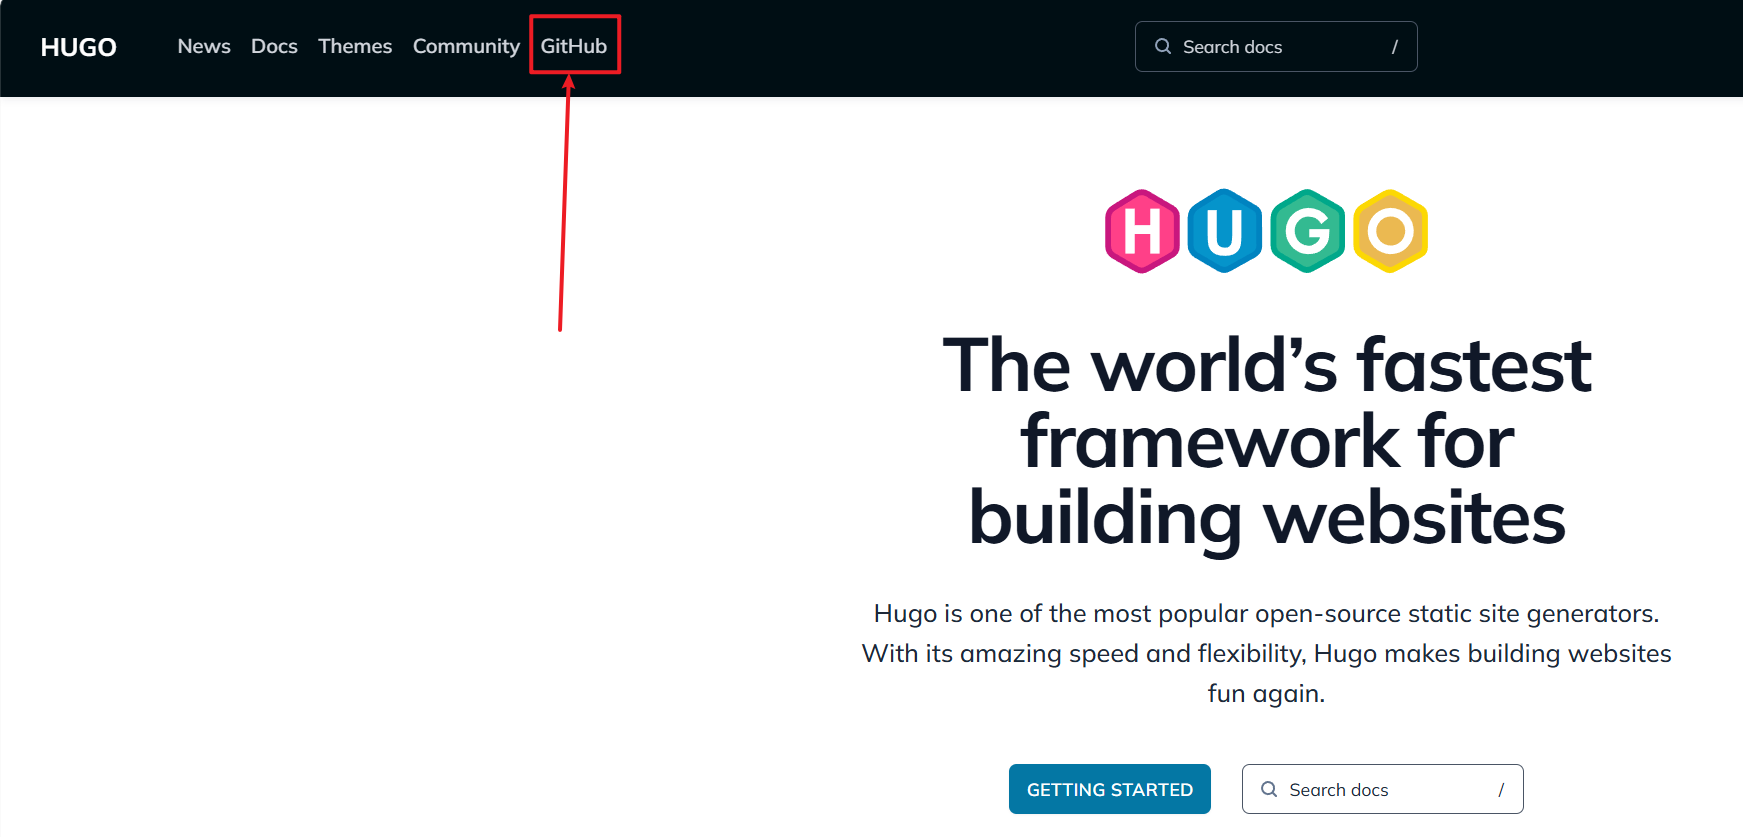
HUGO官网:https://gohugo.io/
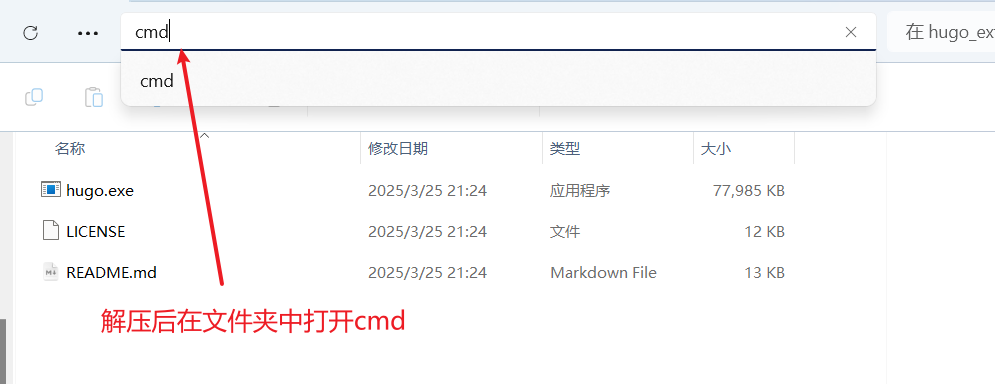
在cmd中输入hugo new site 要创建文件夹的名字
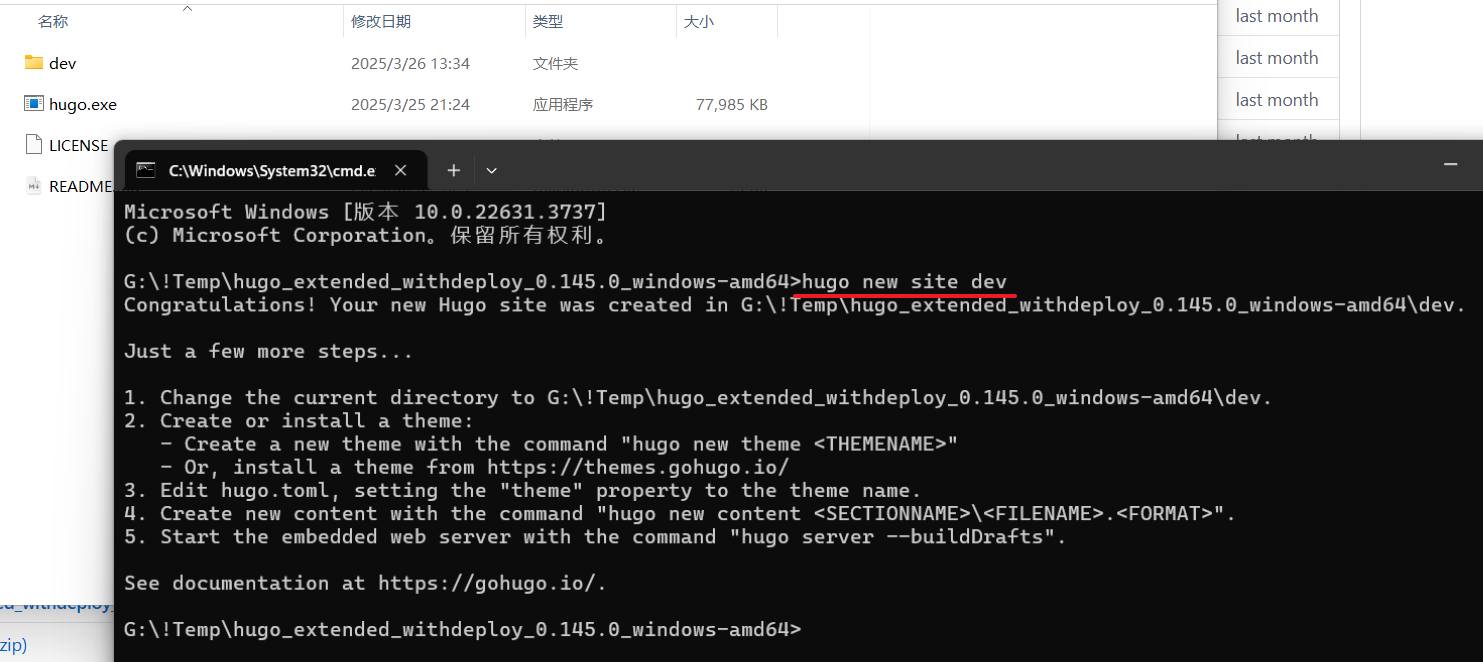
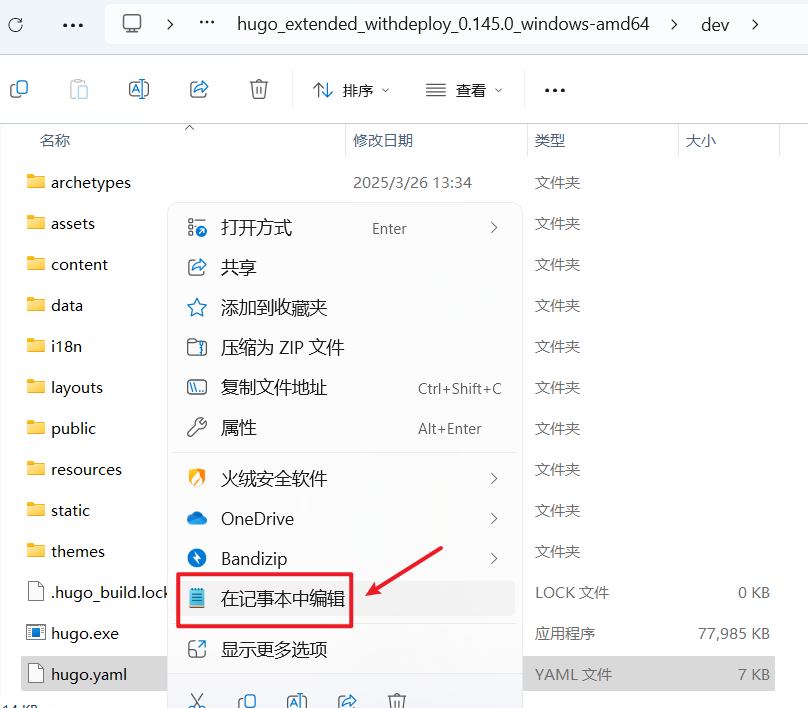
7.若配置了hugo的全局环境变量则无需执行copy命令,若不知道是否配置,则与图中操作一样

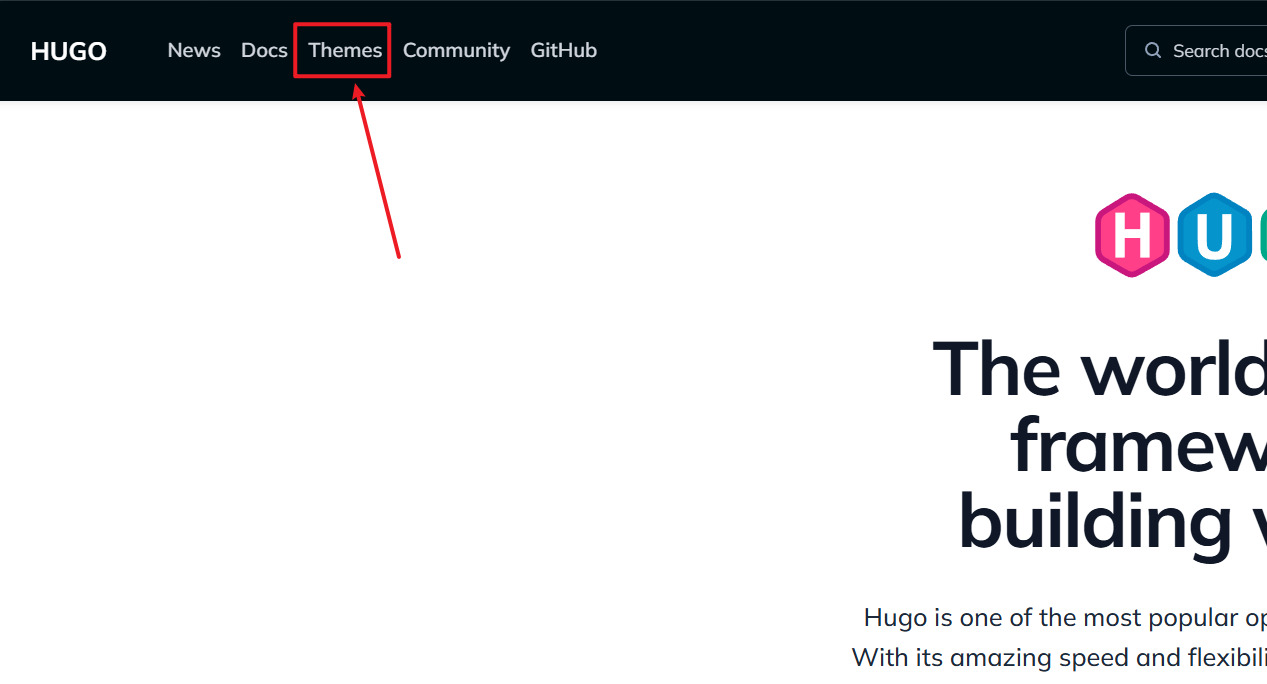
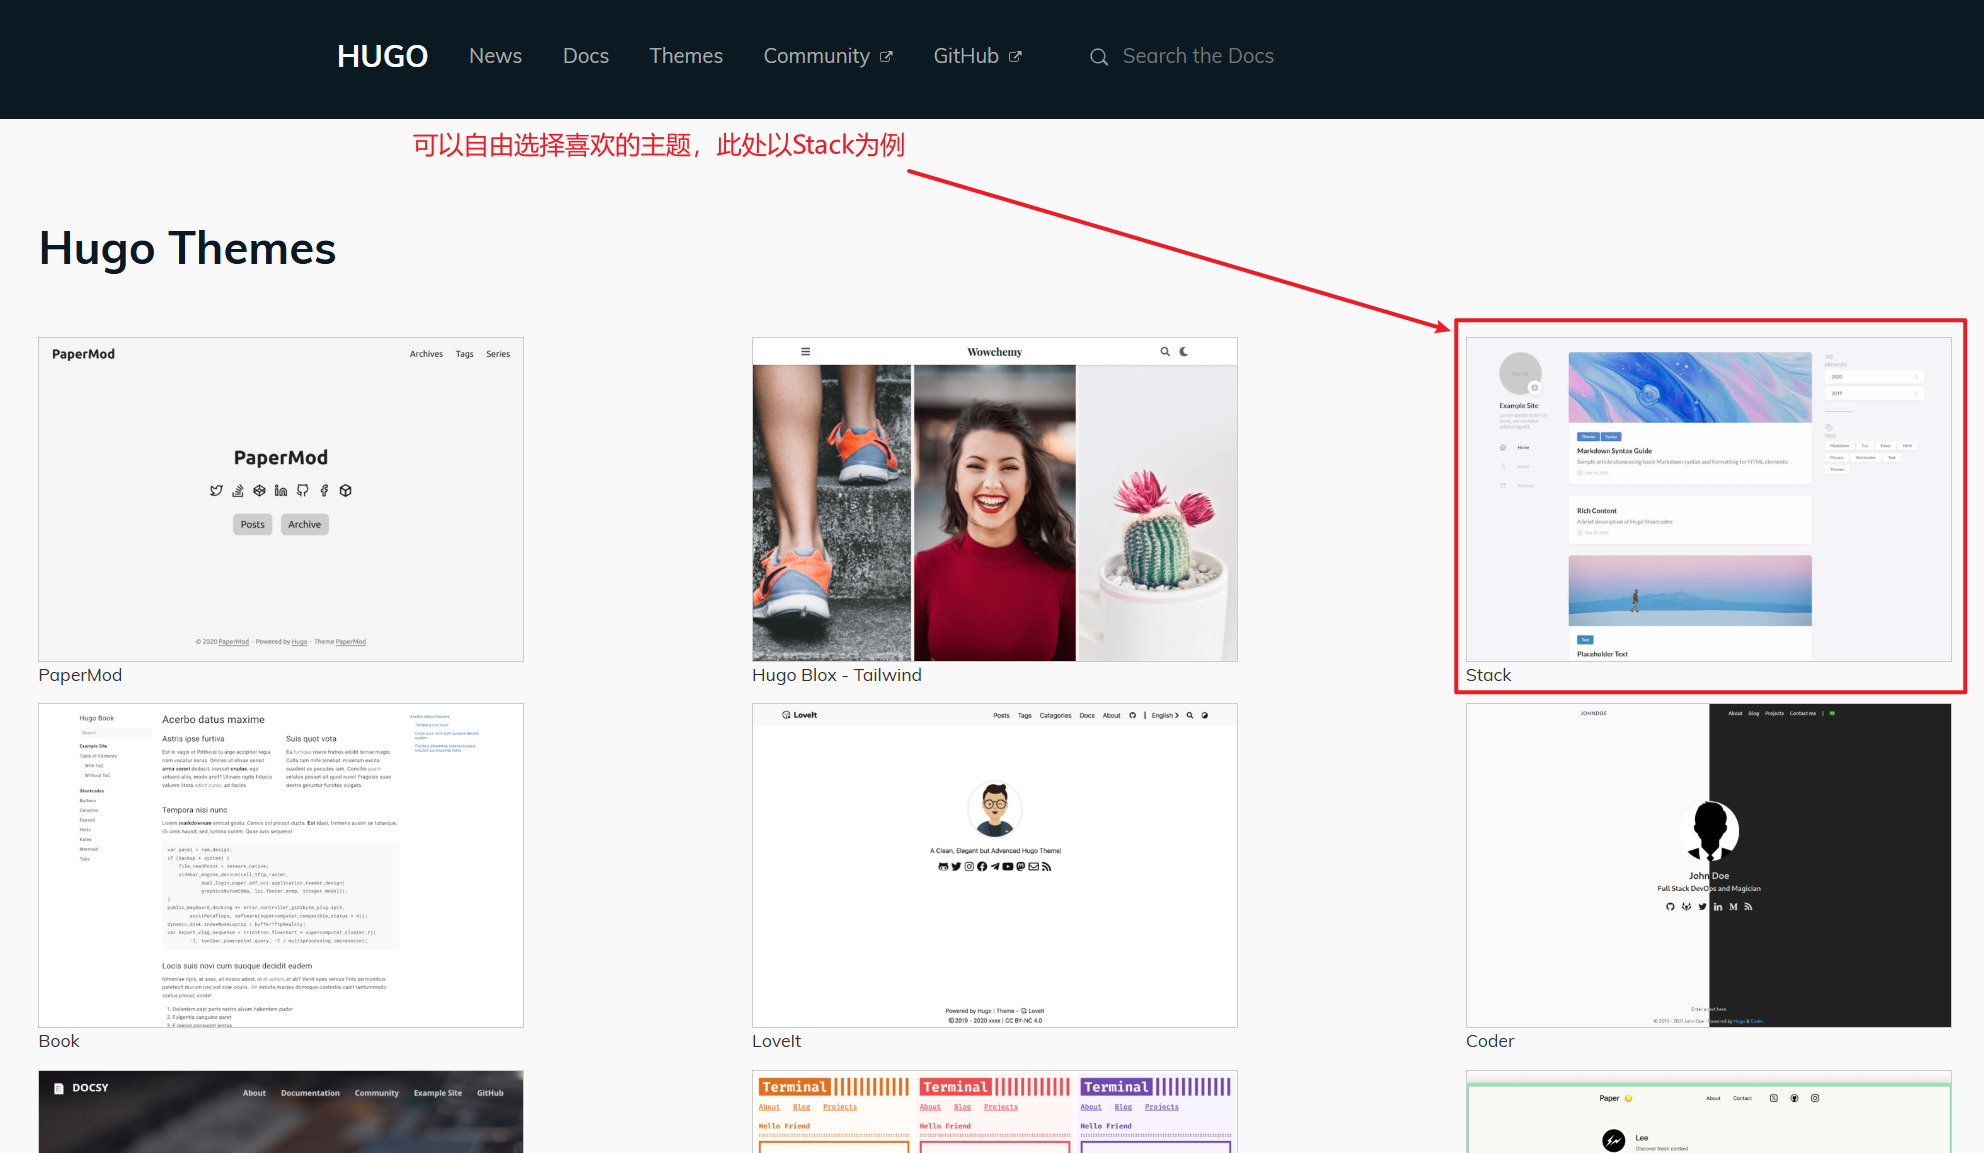
下载网页主题并启动
8.到这一步后,先把cmd窗口放到后台,别关掉,重新打开hugo官网
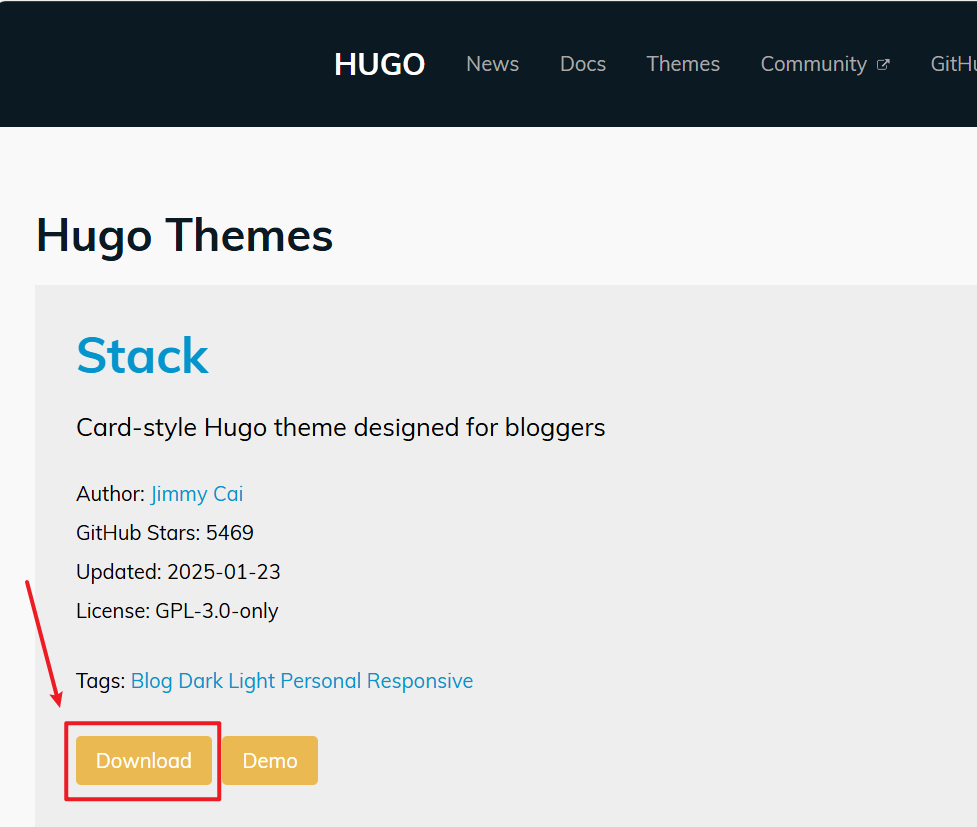
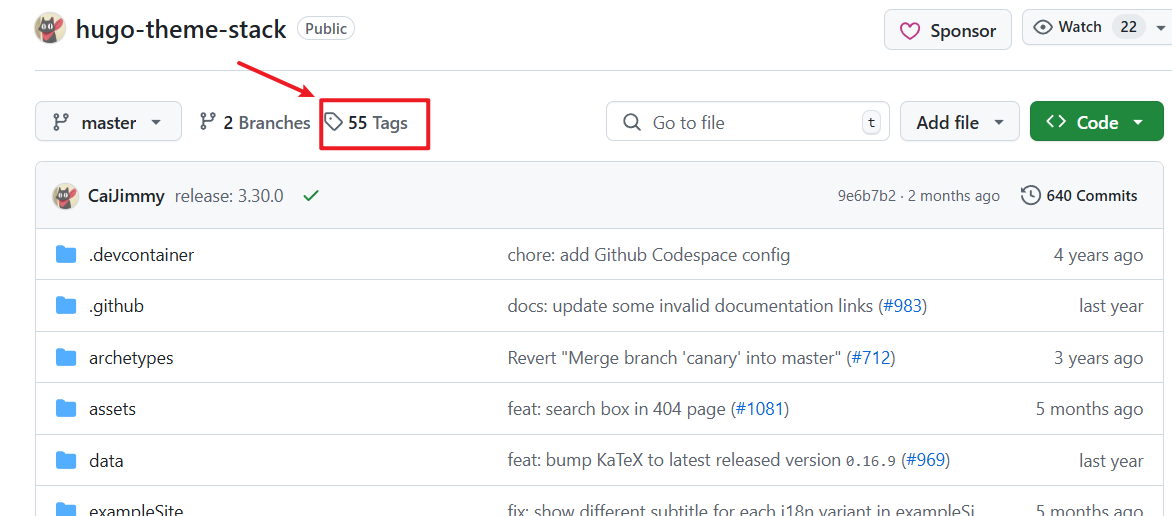
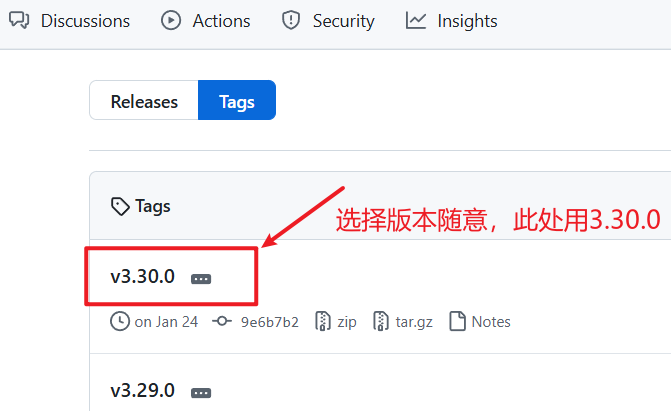
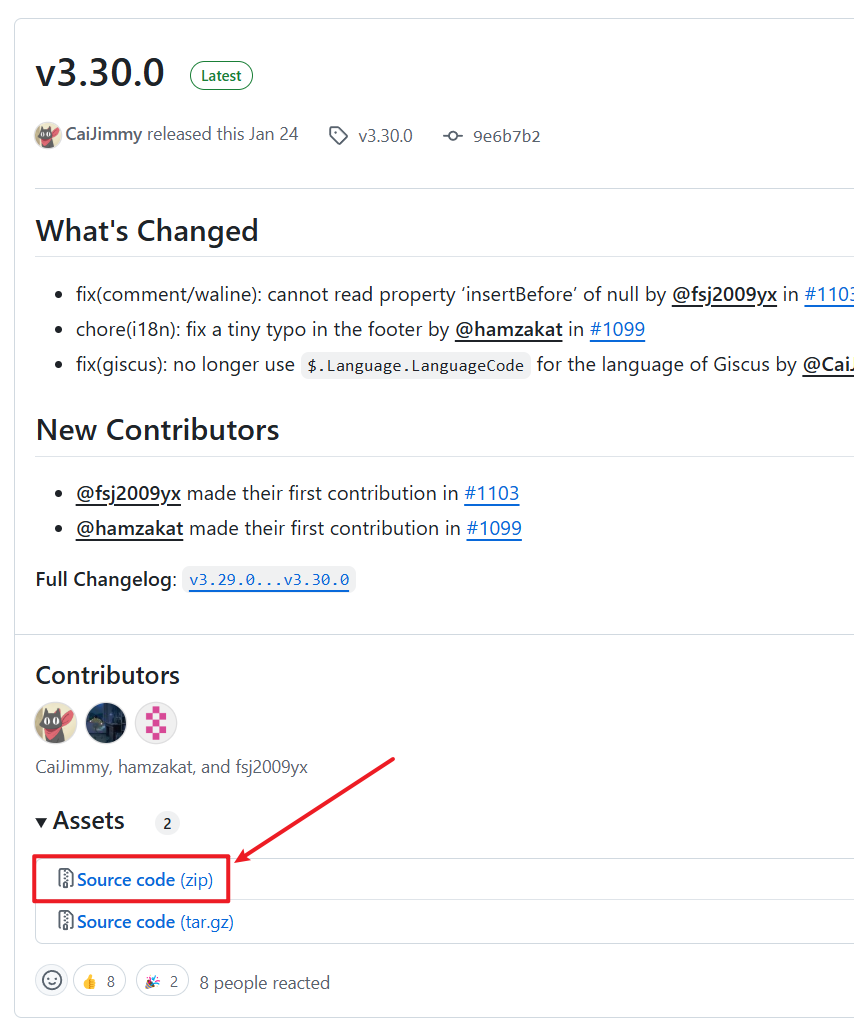
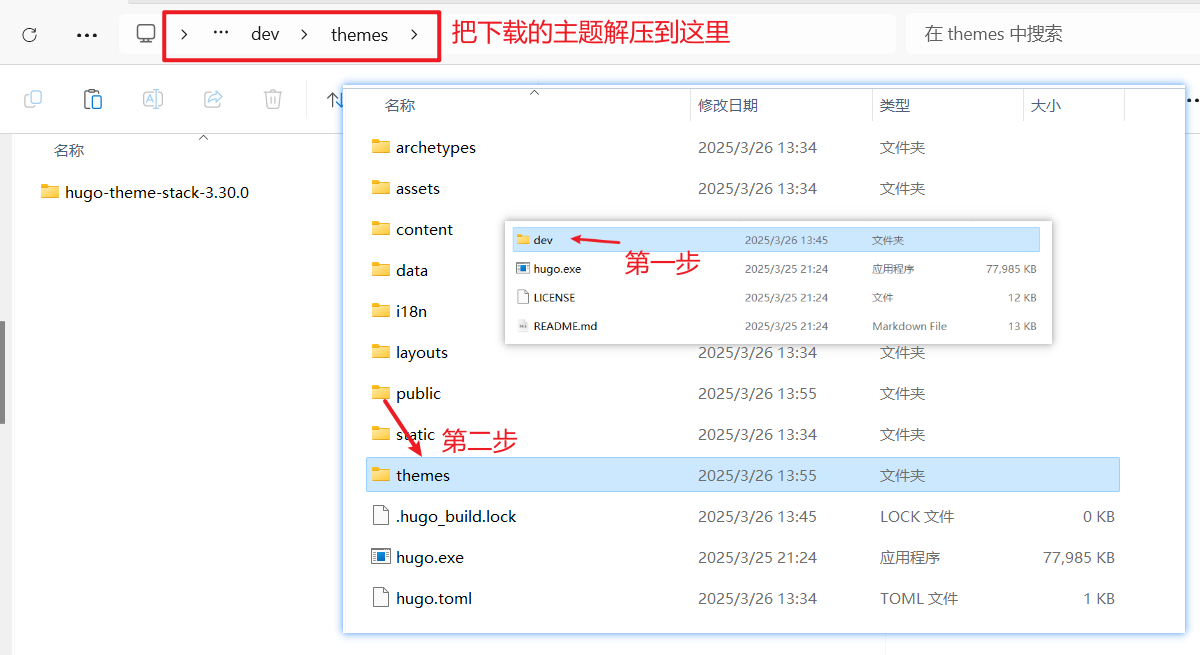
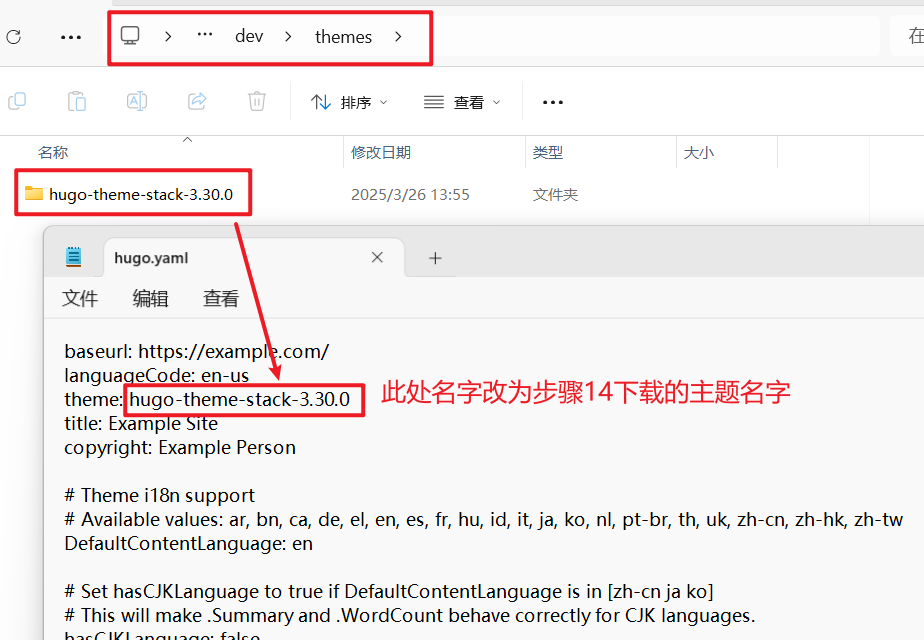
14.下载好主题后,把主题压缩包解压到hugo的themes文件夹中
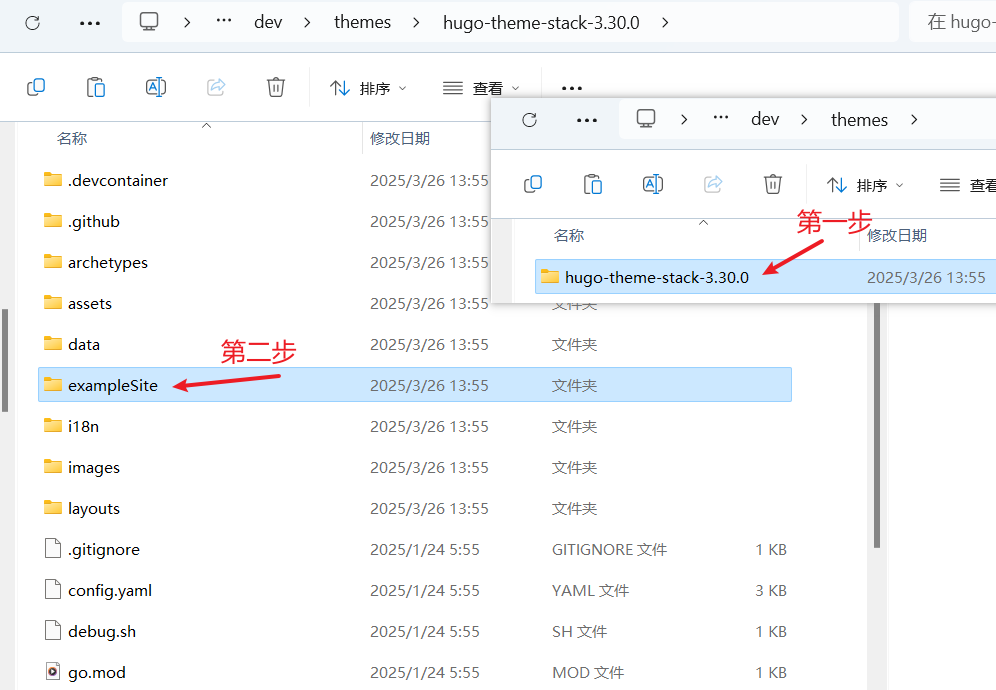
15.打开下载的hugo-theme-stack-3.30.0文件夹,再打开其中的exampleSite文件夹
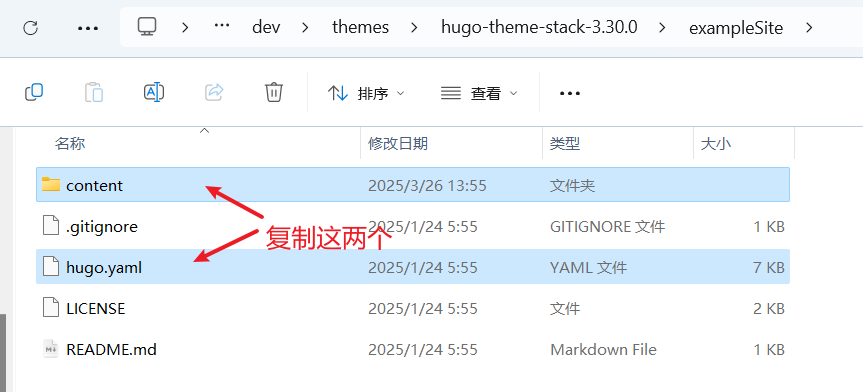
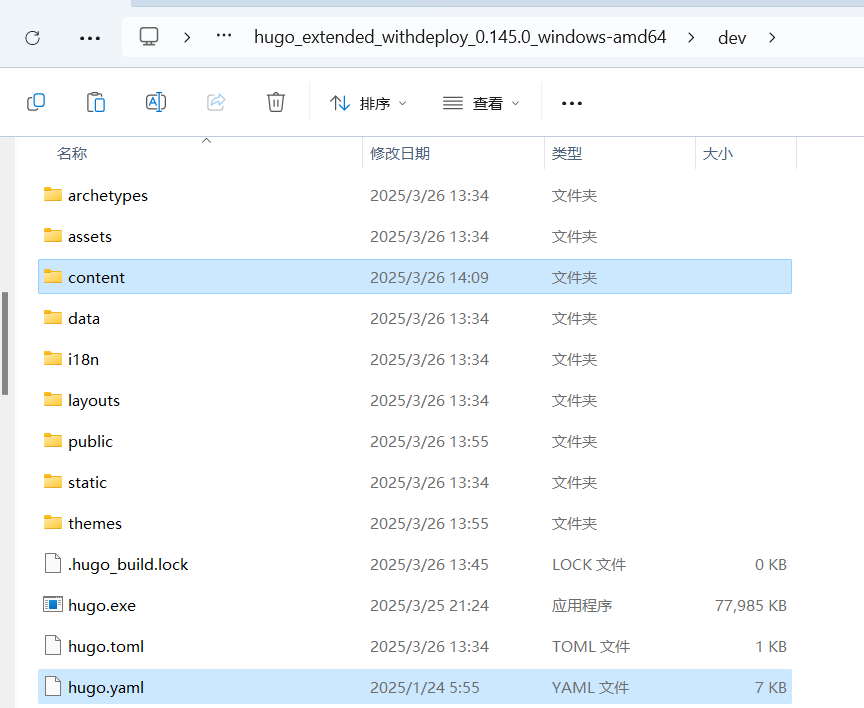
17.粘贴到hugo的dev文件夹下
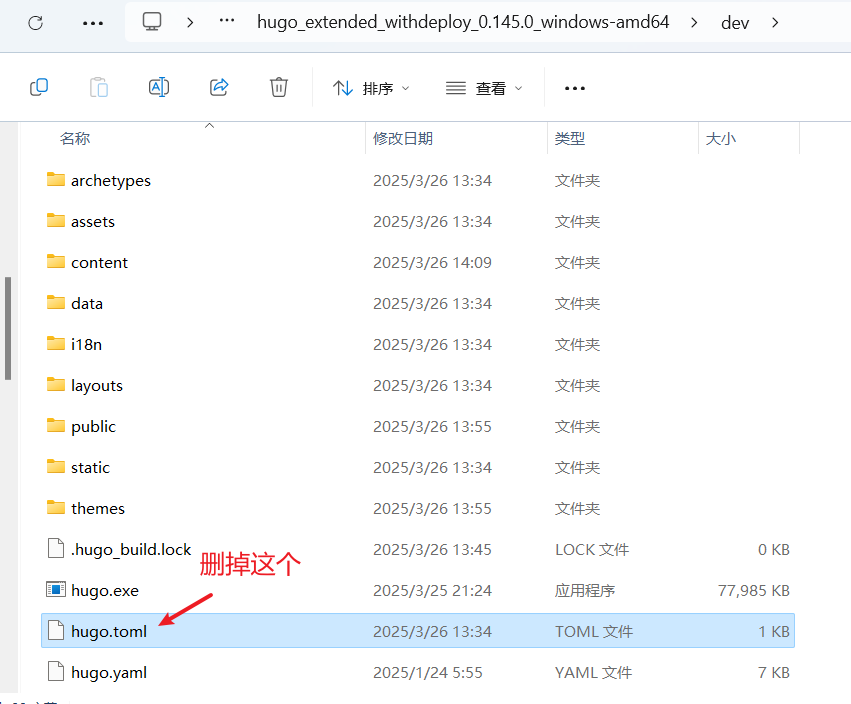
18.删掉hugo.toml,因为刚刚复制的hugo.yaml与其作用是一致的,相当于已经配置好了的hugo.toml
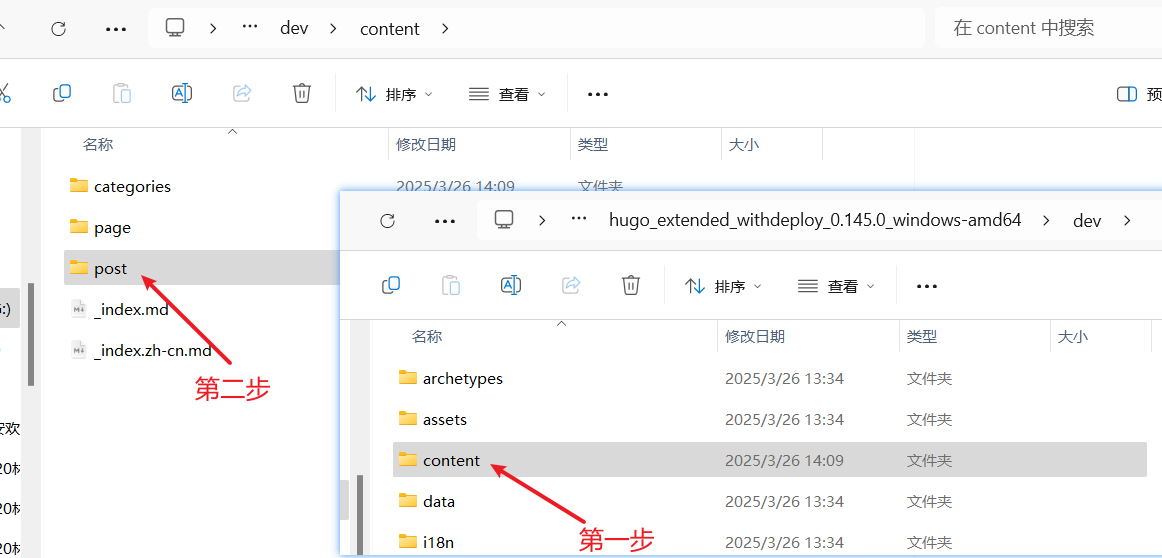
19.然后打开刚刚复制过来的content文件夹,再打开之中的post文件夹
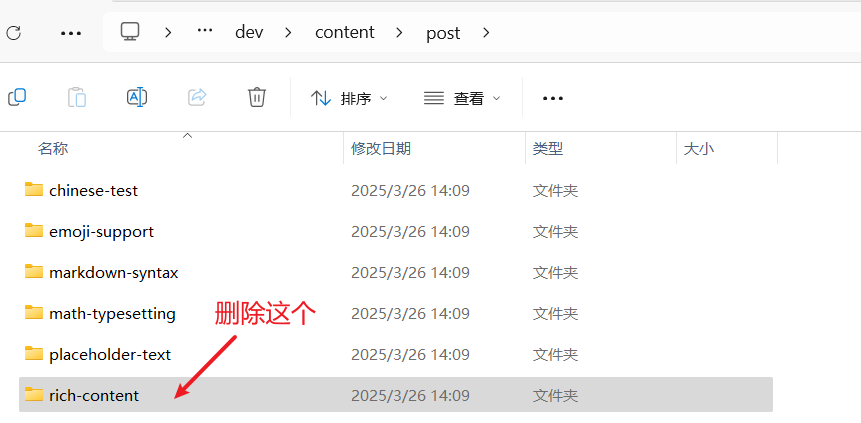
20.因为rich-content中有引用国外网站,可能会导致之后无法启动网页
21.回到dev文件夹
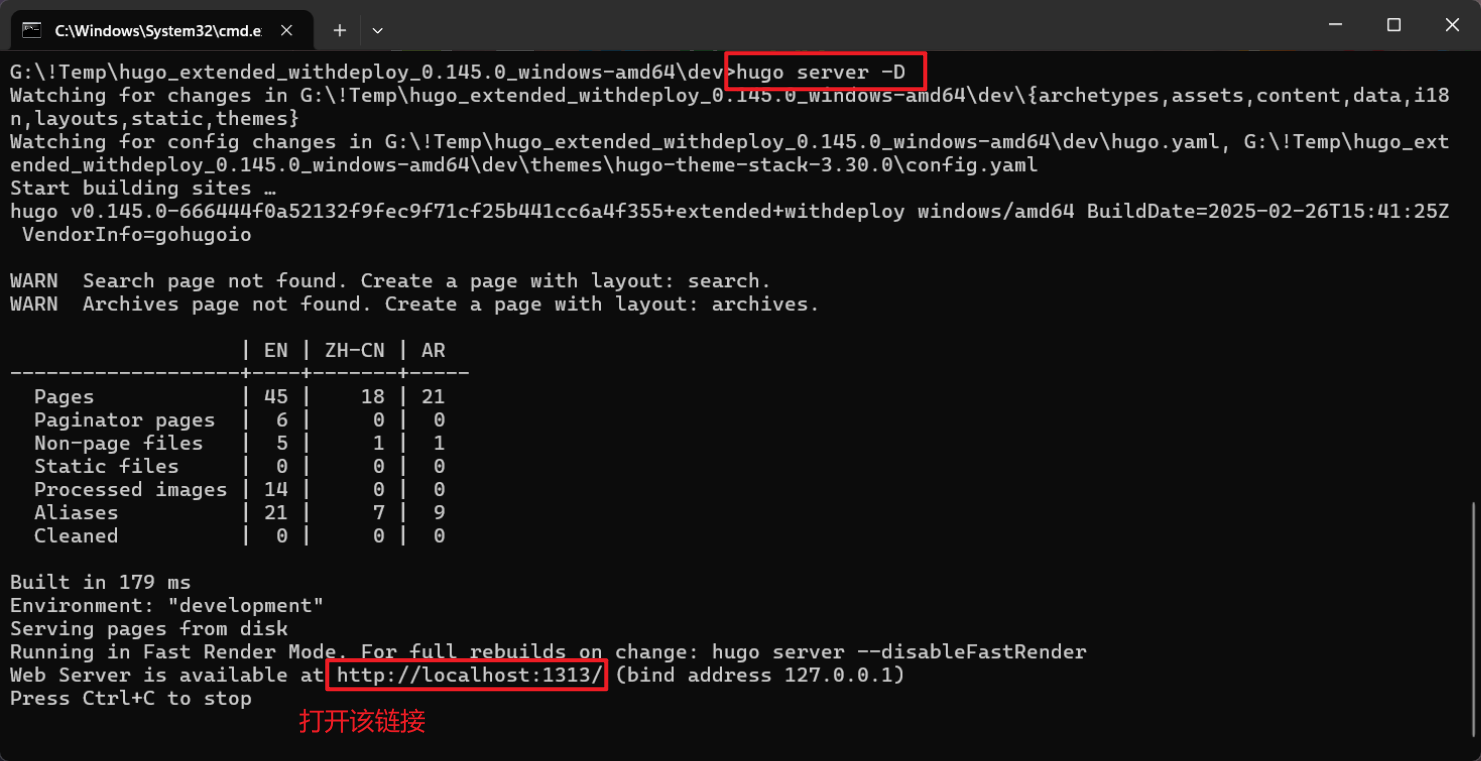
23.此时已经可以启动网页了,点开步骤8时放在后台的cmd窗口,输入hugo server -D(其实就是官方提示的命令hugo server --buildDrafts的缩写)
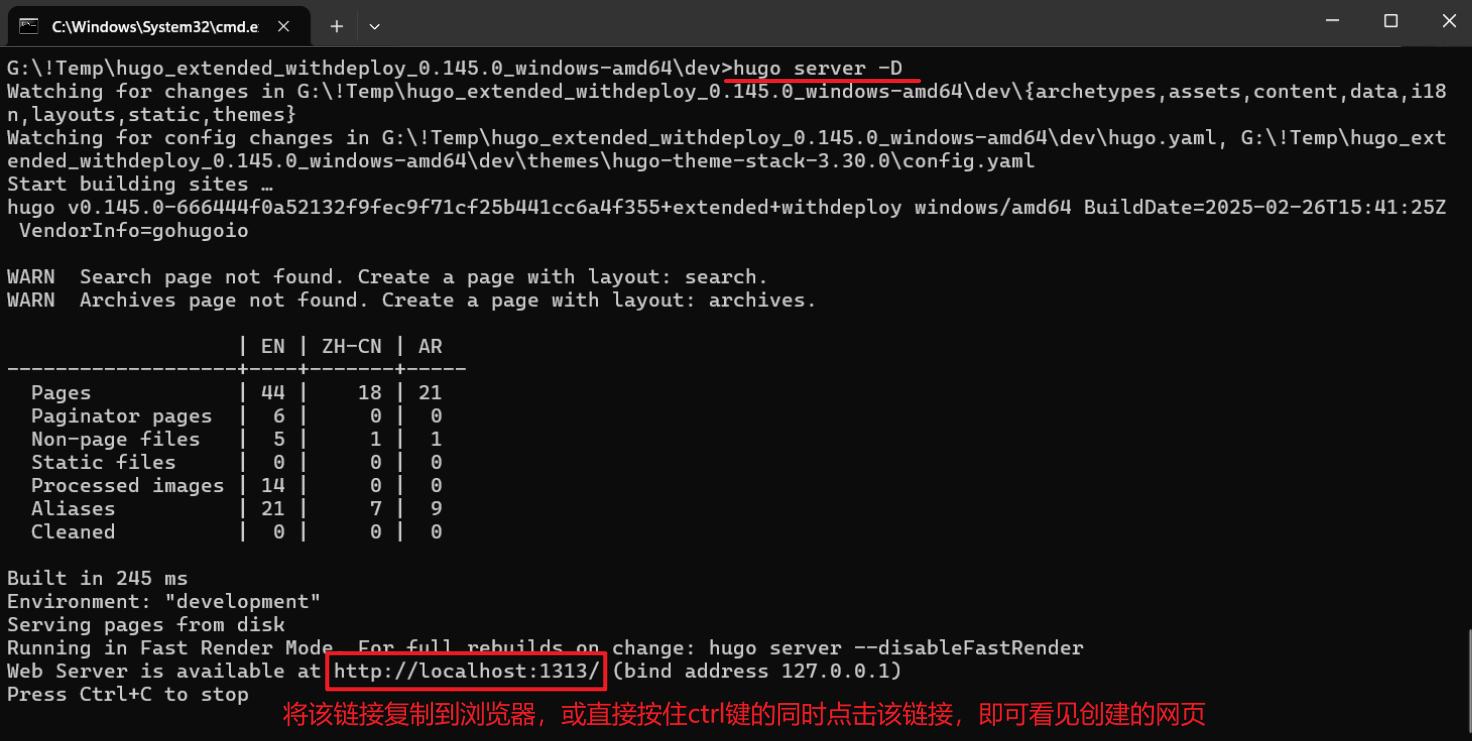
24.注意别关闭cmd窗口,关闭后就打不开下方网页了
创建第一个博客
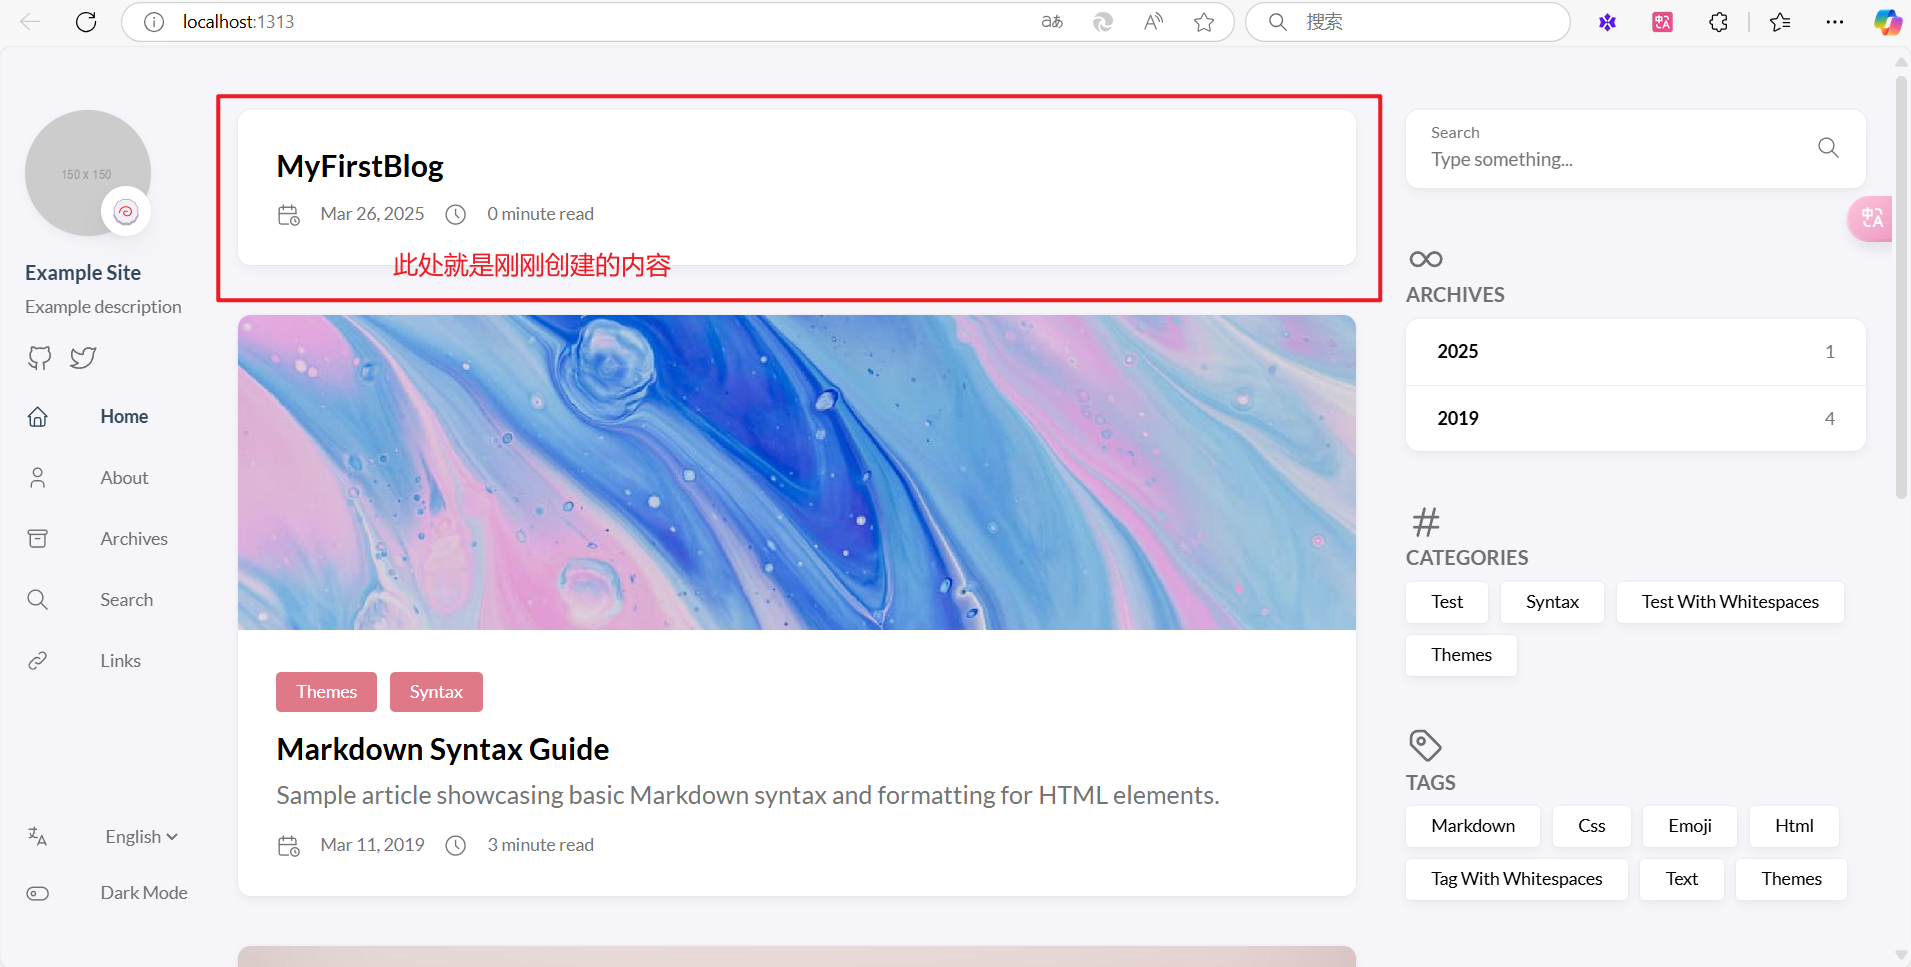
25.网页启动后可以在cmd窗口用快捷键Ctrl+C结束网页,此时就可以继续输入命令了。
输入hugo new content post/myFirstBlog/index.md创建新内容

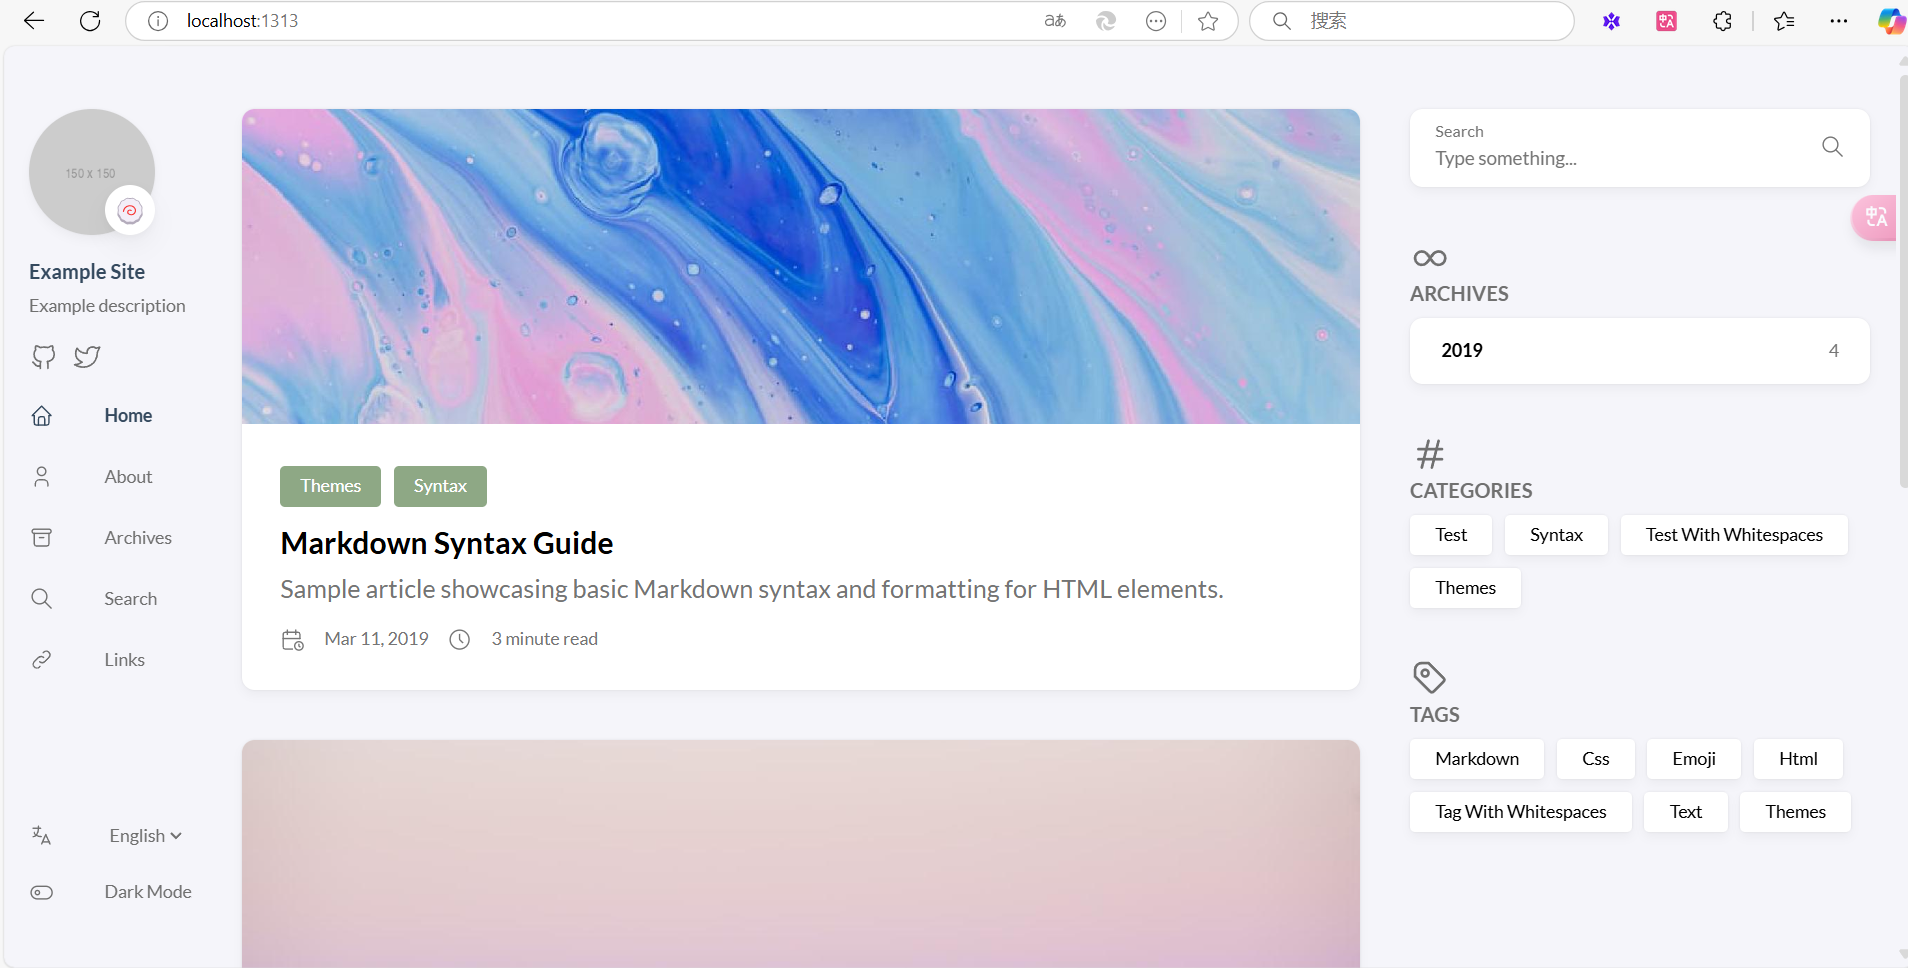
26.在cmd窗口输入hugo server -D,重新启动网页
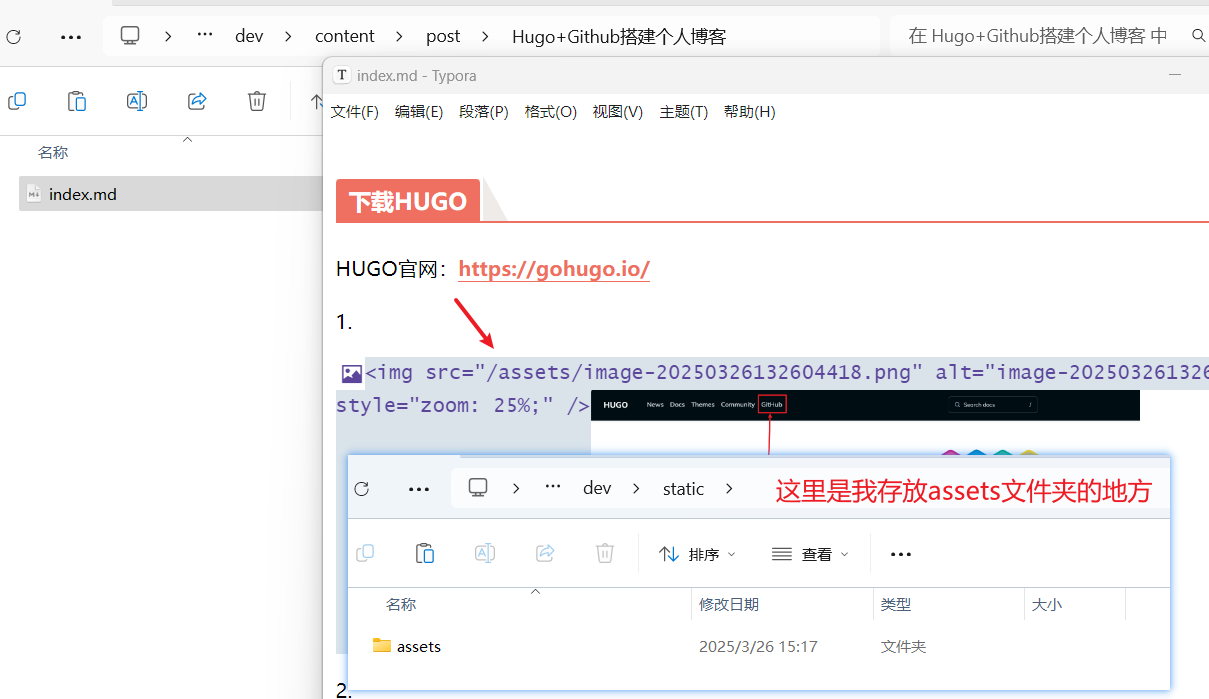
27.Hugo的默认根路径在在static文件夹,所以要注意修改笔记中图片的路径
stack主题配置
见参考视频
Github常规部署
28.下载Git:https://git-scm.com/downloads/win
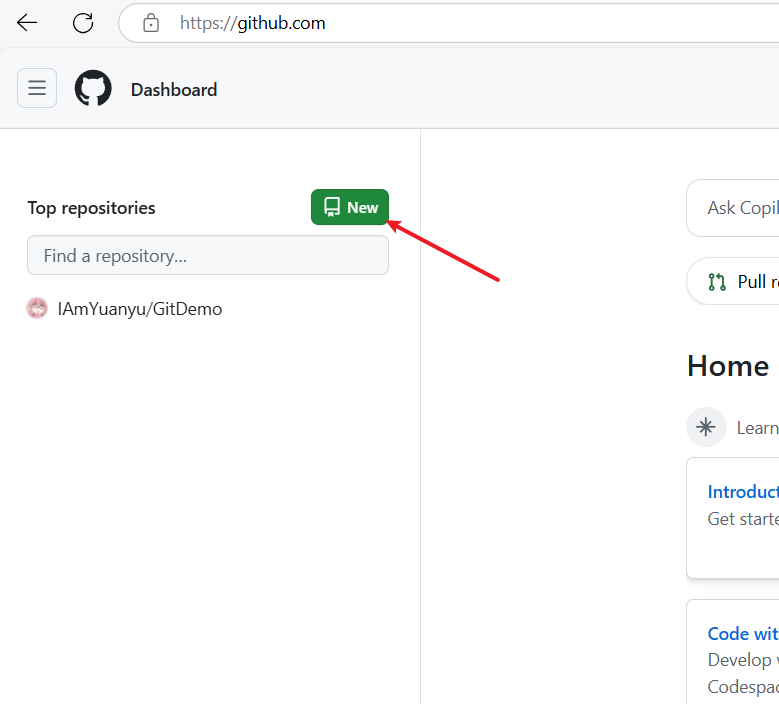
29.登录Github:https://github.com/
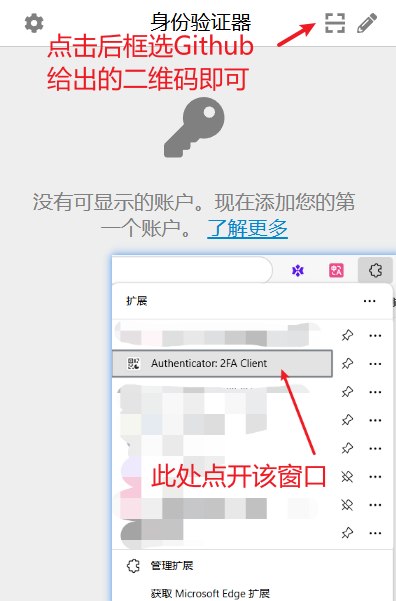
若Github要2FA验证,可以下载下方插件

下载方式如下
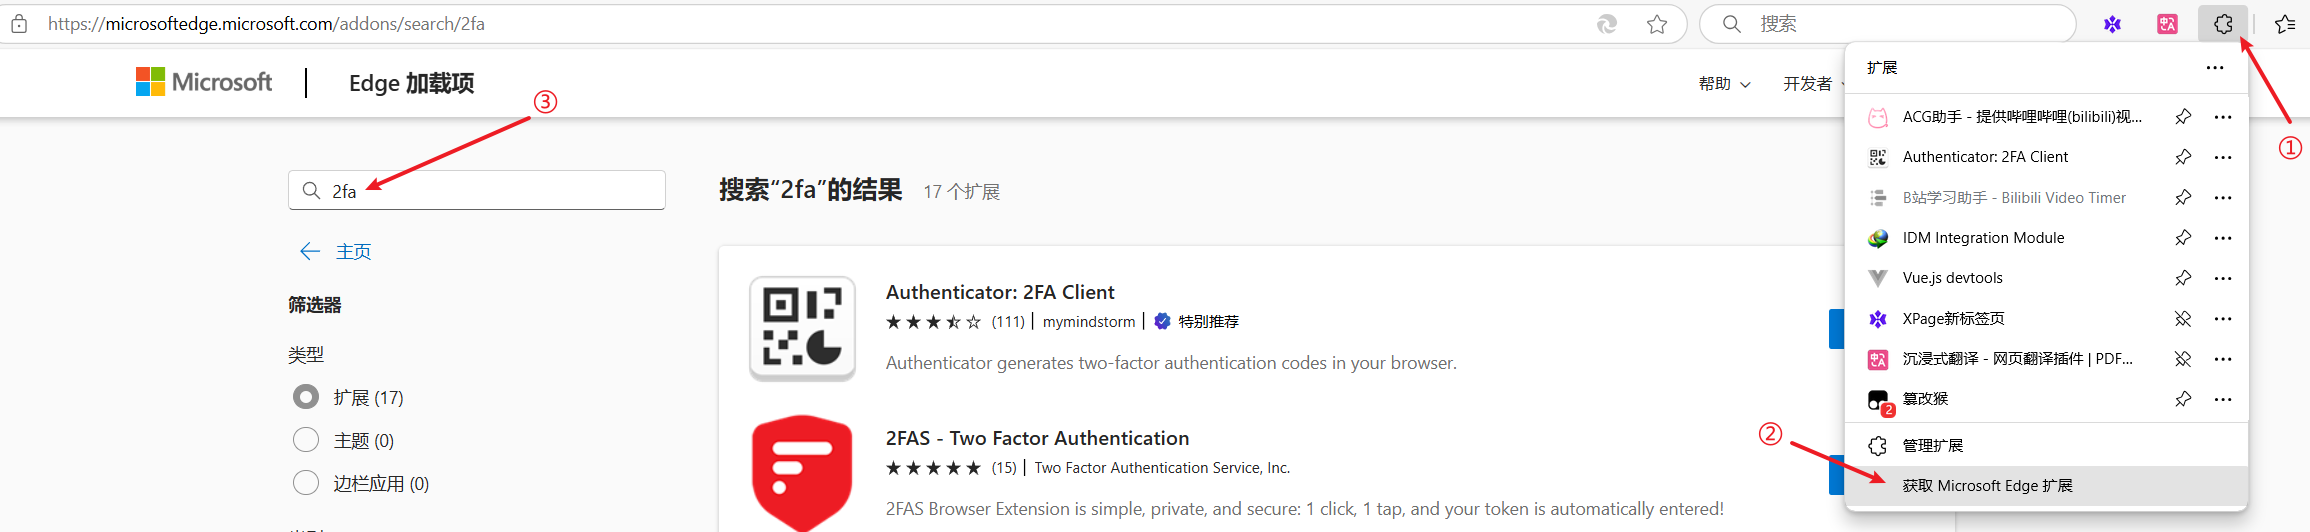
使用方式:
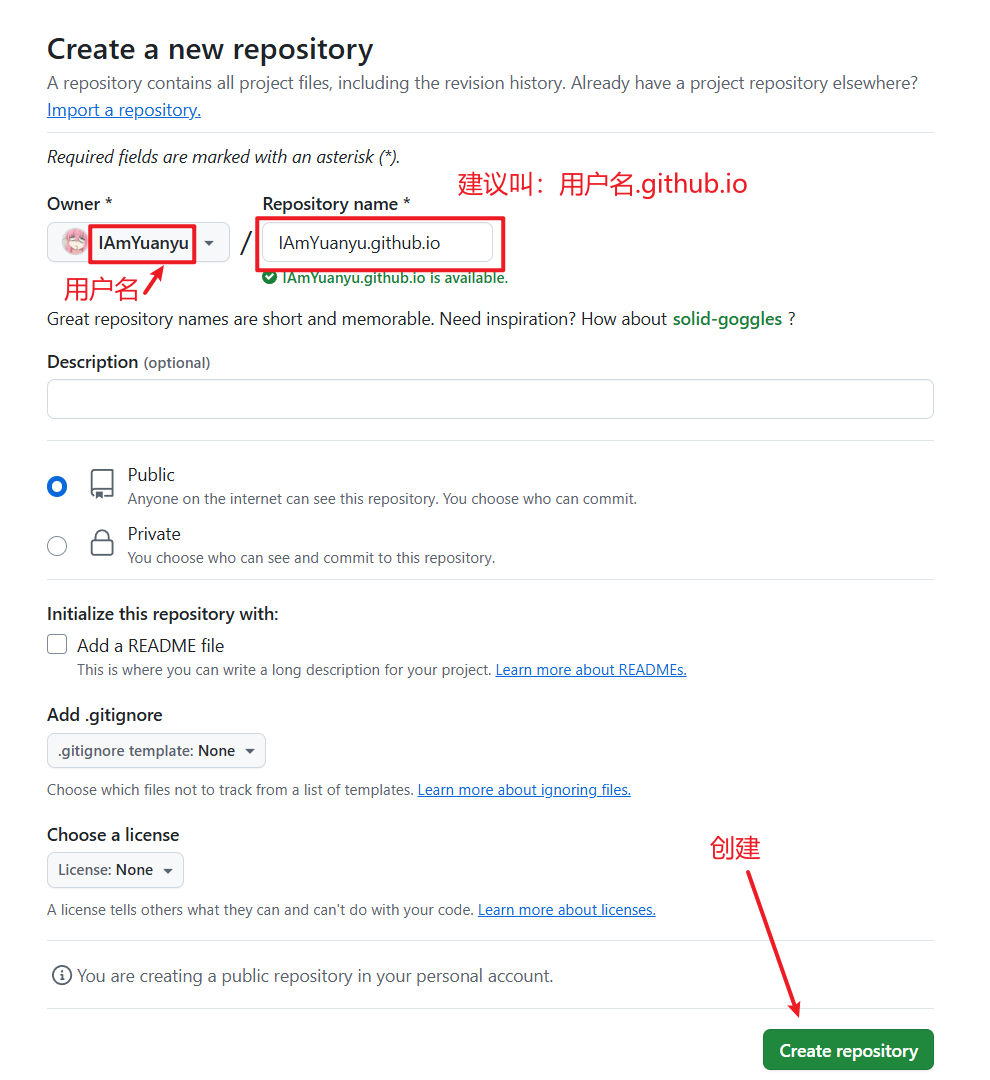
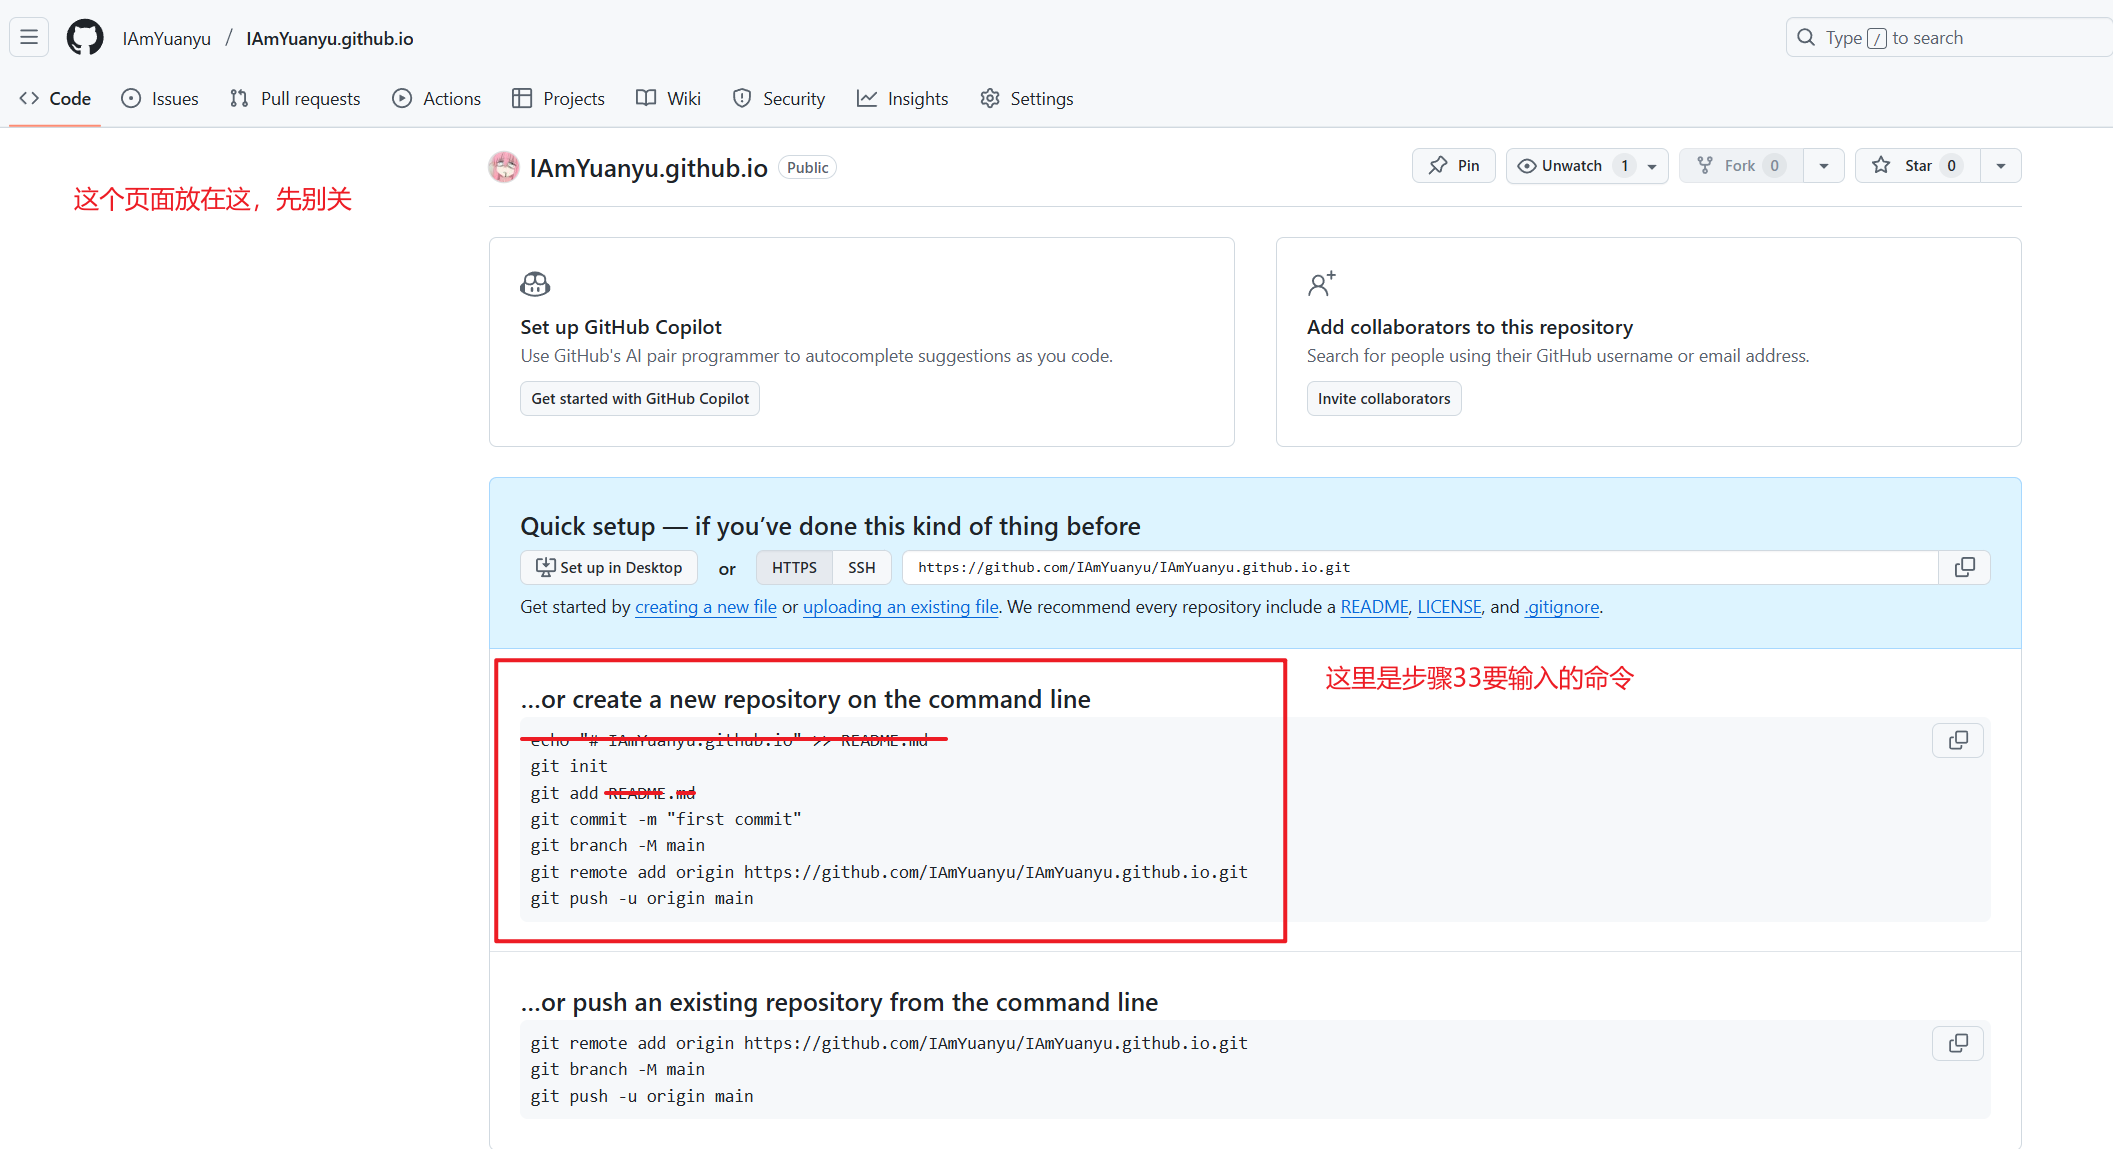
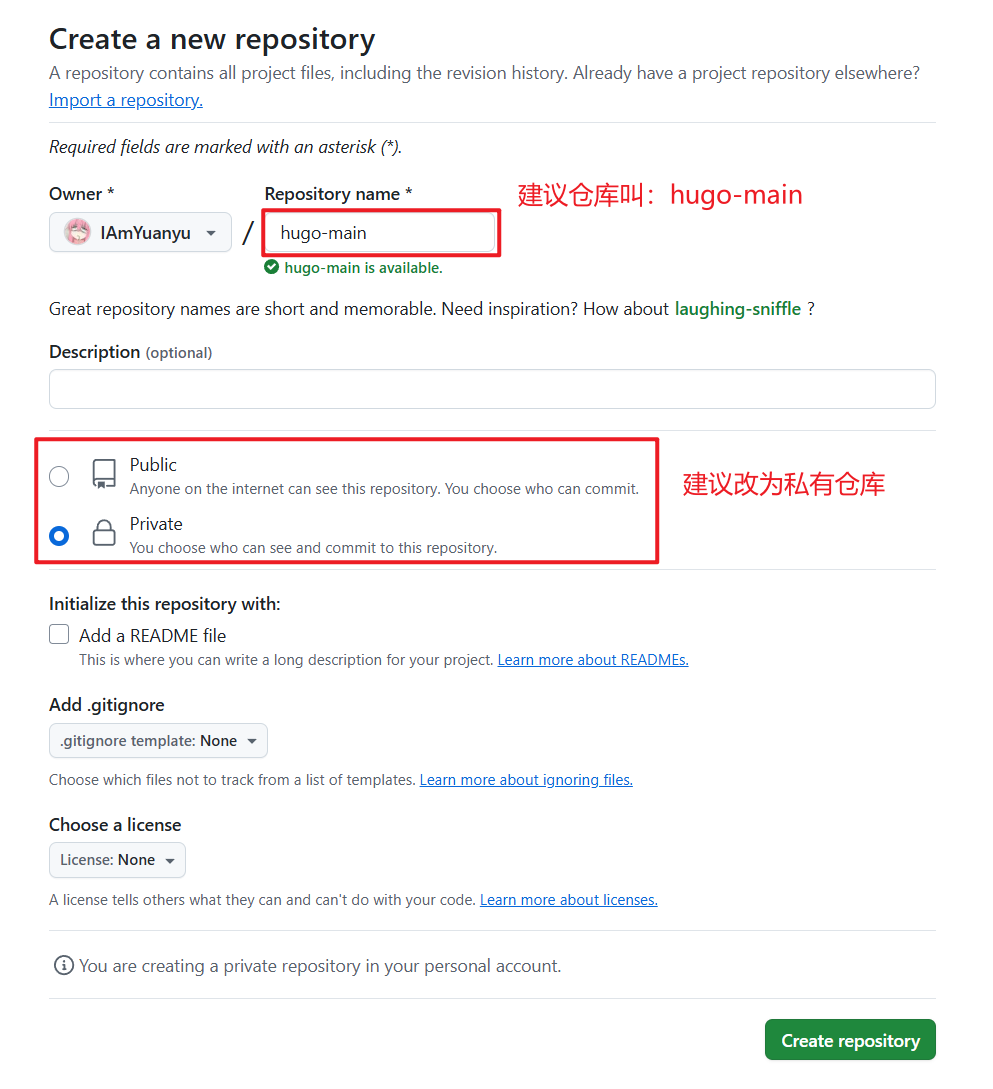
30.创建仓库,创建后出现的页面别关掉
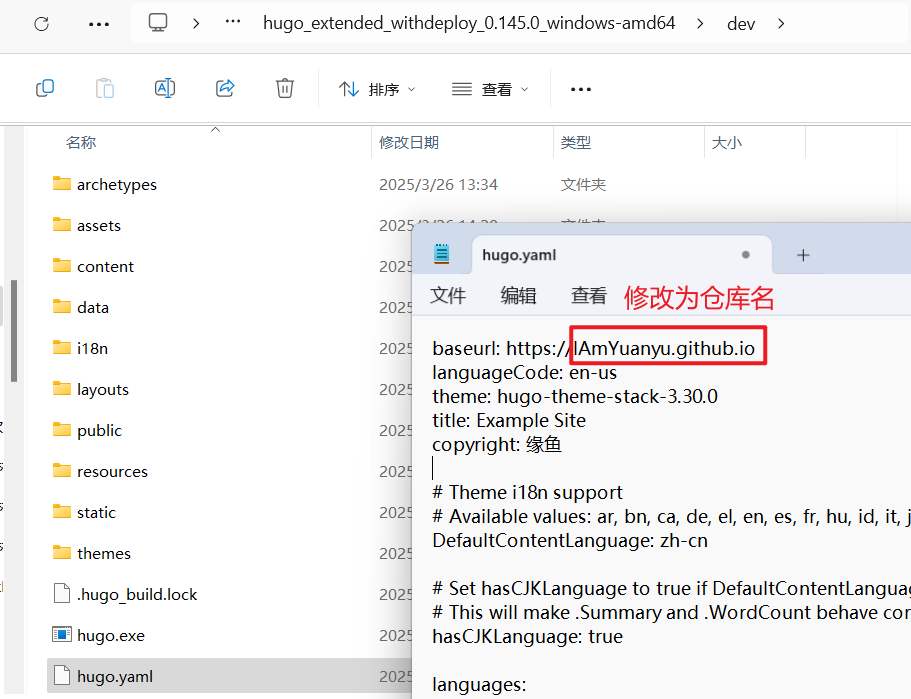
31.修改hugo.yaml中baseurl
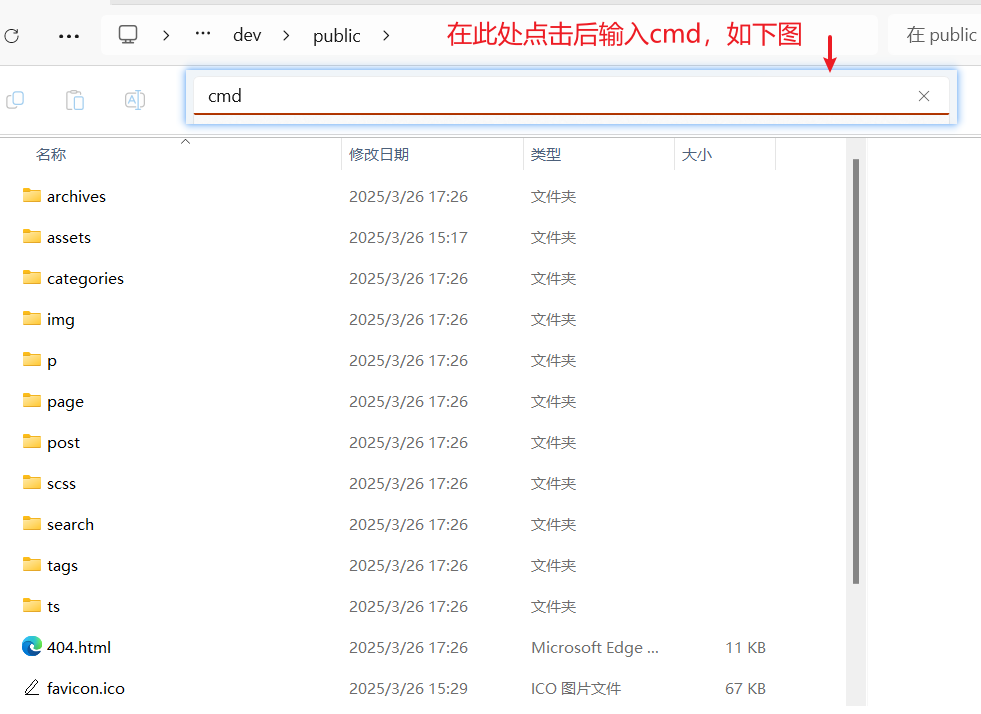
32.打开dev中的public文件夹,在路径处输入cmd
补充(非必要,可不看):可以先删掉public文件夹,再在cmd窗口输入hugo -D重新生成一个public文件夹。因为在配置主题的时候可能会把很多没必要的地方删掉,而删掉的部分仍留在public中,这时就可以用hugo -D重新生成一次静态页面
33.然后在cmd窗口依次输入git init、git add .、git commit -m "first commit"、git branch -M main、git remote add origin https://github.com/xxx/xxx.github.io.git(这里填你自己的仓库地址)、git push -u origin main,中间输出部分太长,就不放在图中了

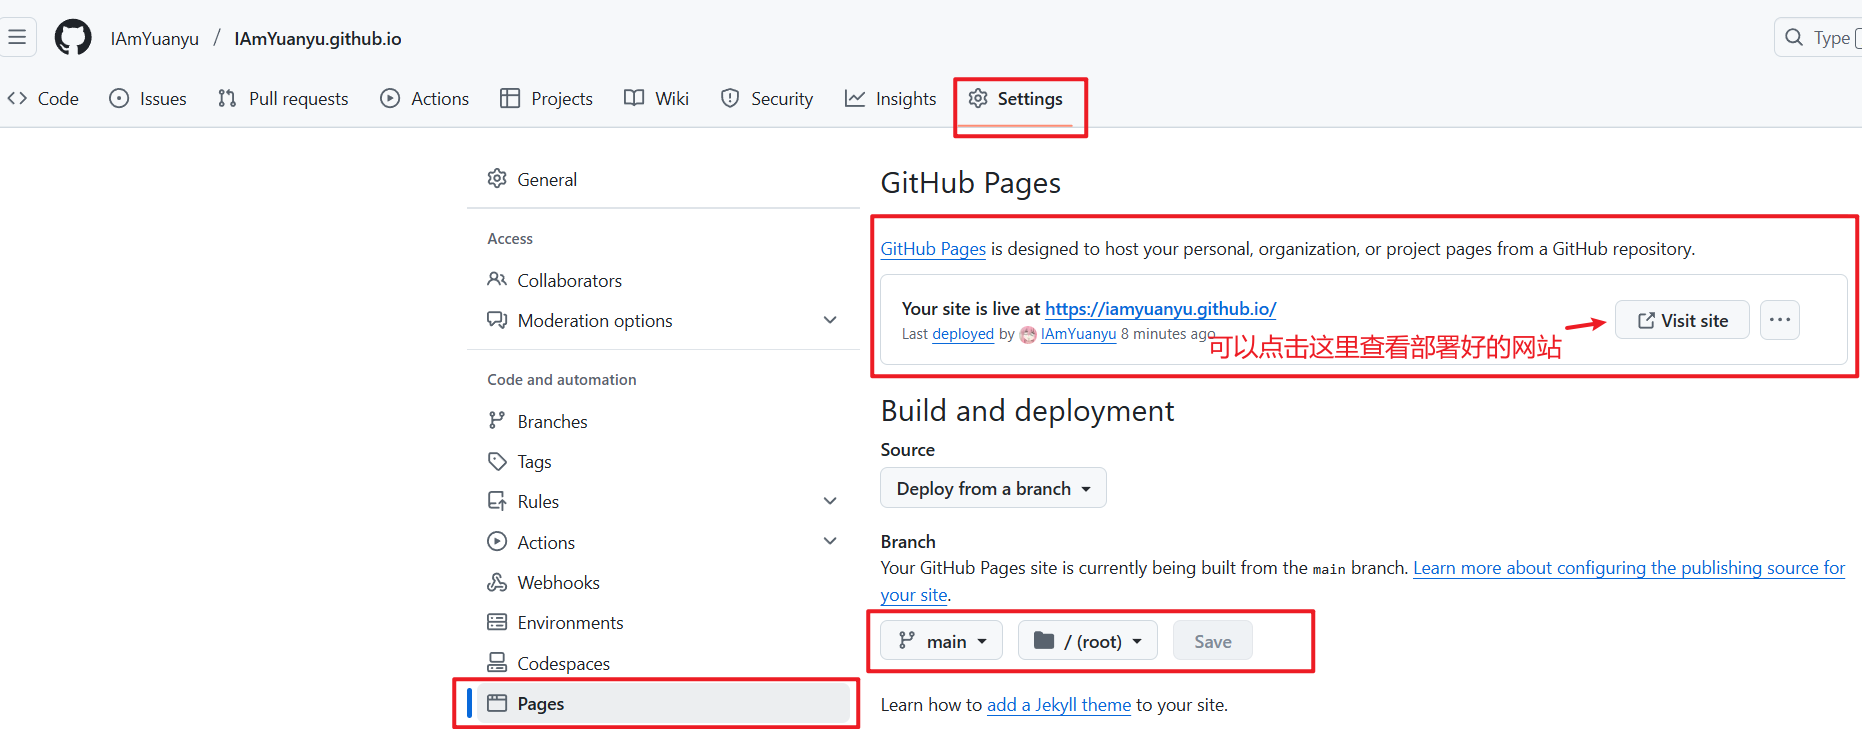
34.如果和图中一样说明部署完成了
Github自动部署
自动部署:当你在
dev文件中push代码后,页面就会自动更新
35.再创建一个仓库
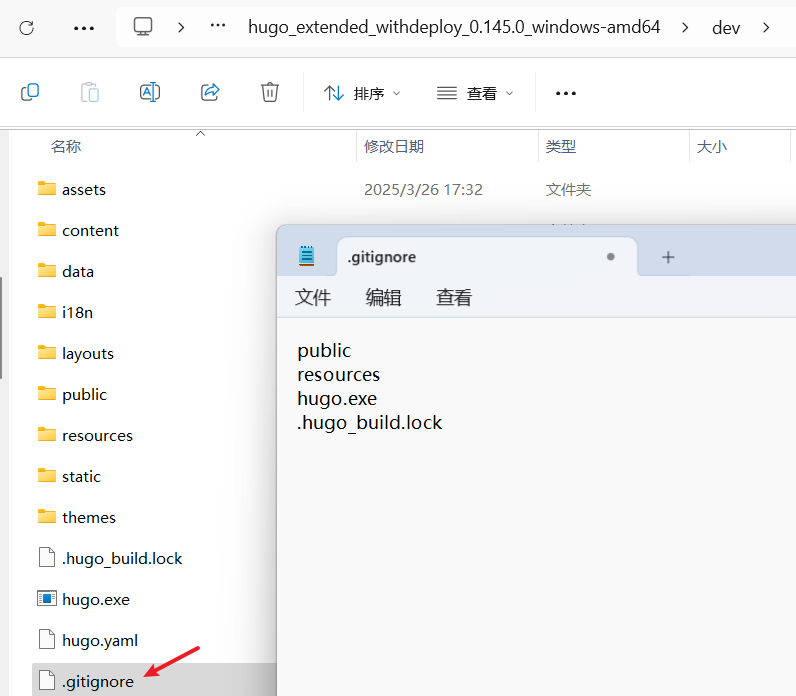
36.打开dev文件夹,创建一个.gitignore文件,内容如图(不会创建.gitignore文件,就在此处打开cmd窗口,输入type nul>.gitignore即可)
37.在dev文件夹打开cmd窗口,再执行一次和步骤33一样的操作(git remote add origin https://……命令记得换成hugo-main的仓库地址)
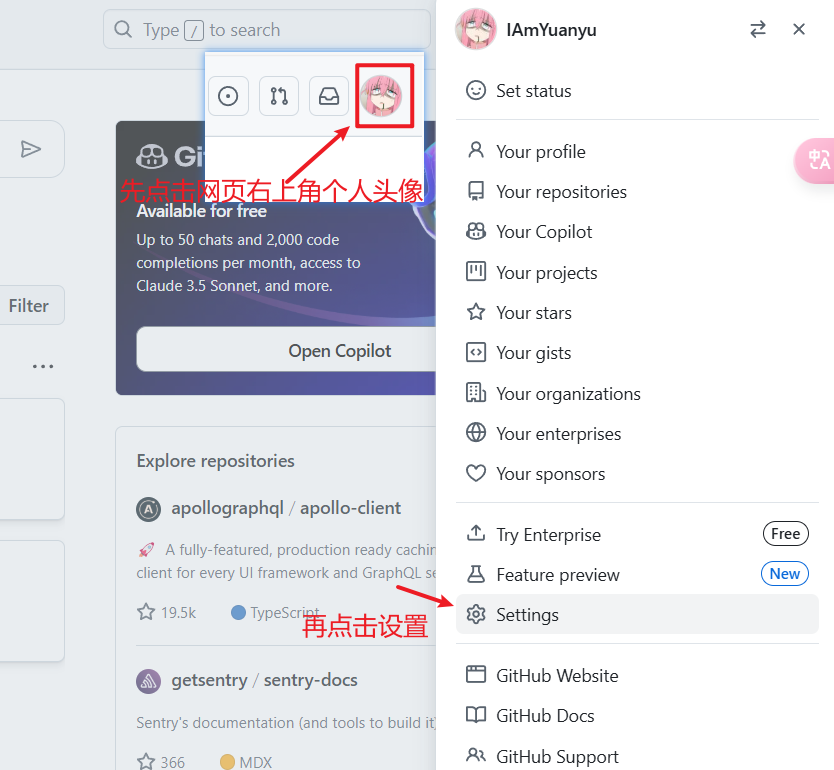
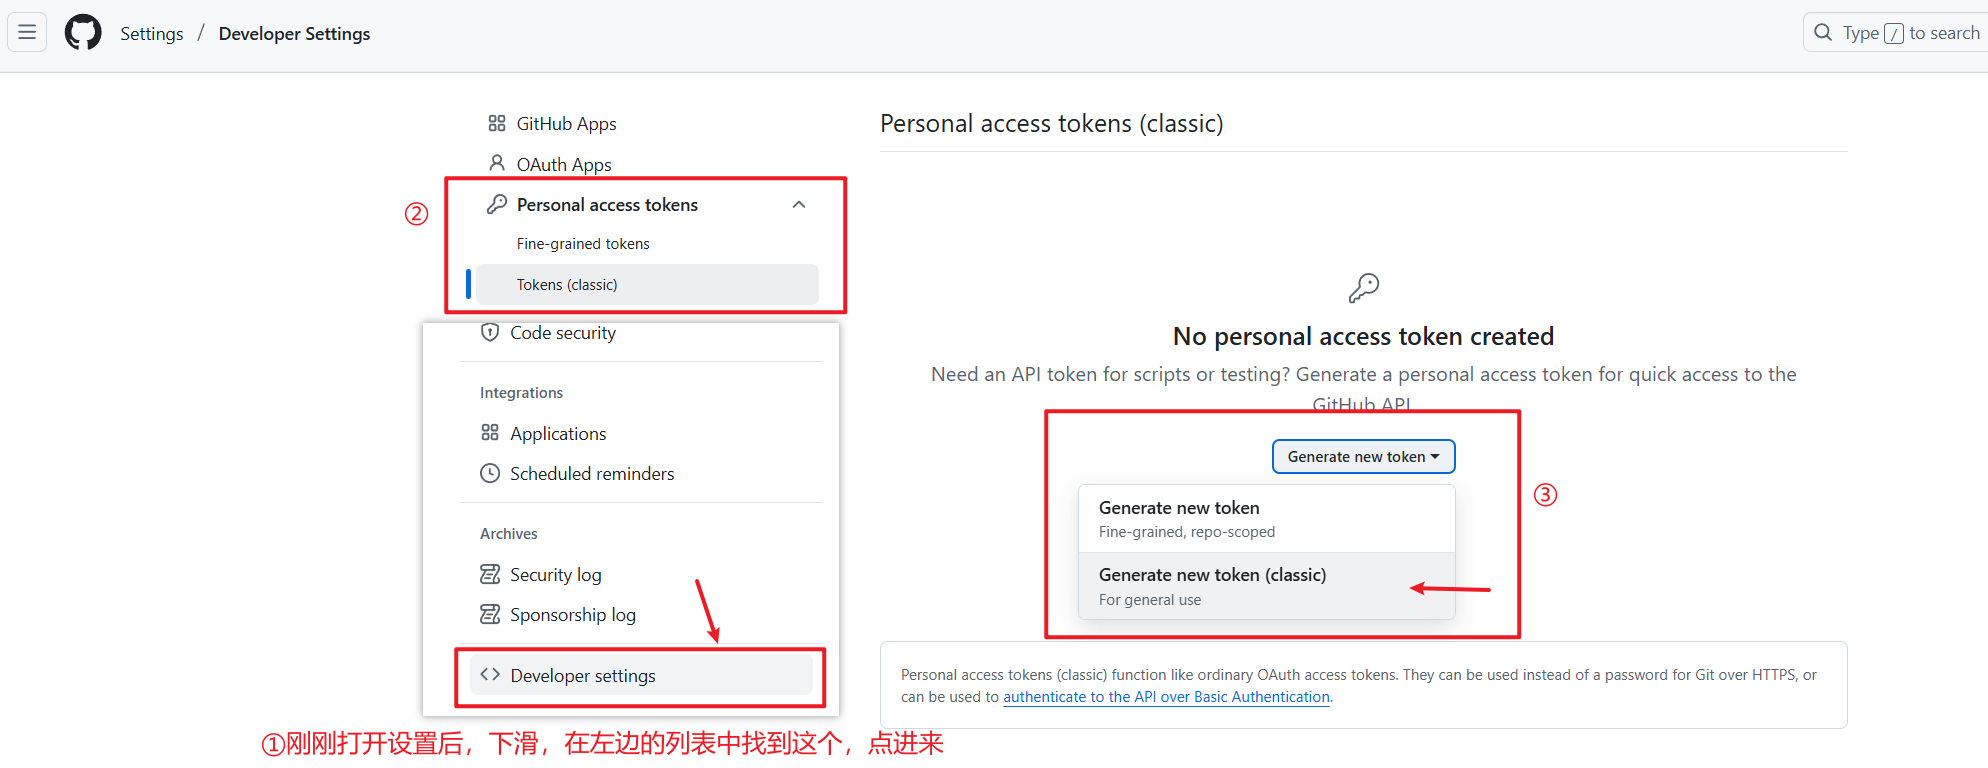
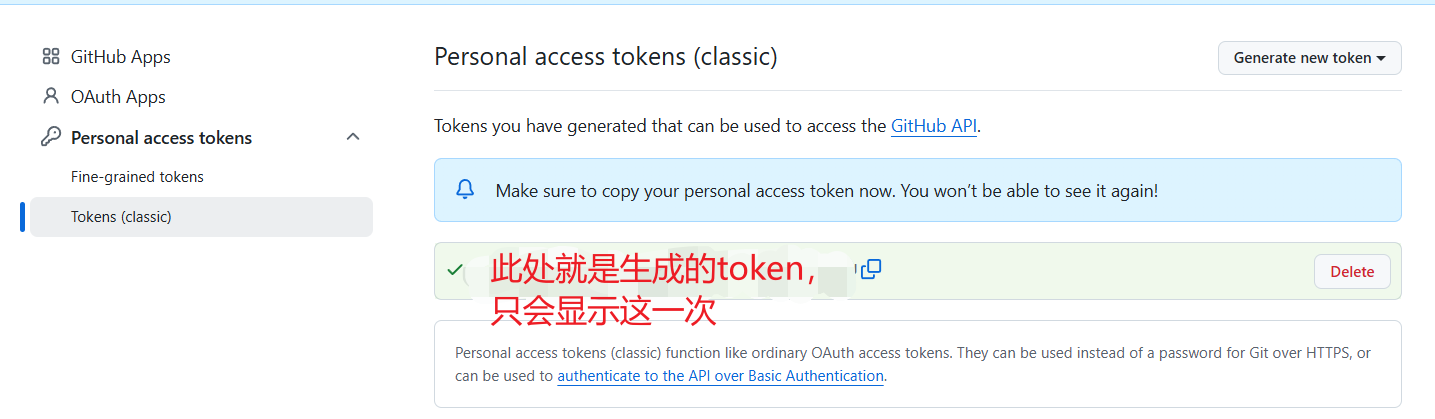
38.返回Github首页
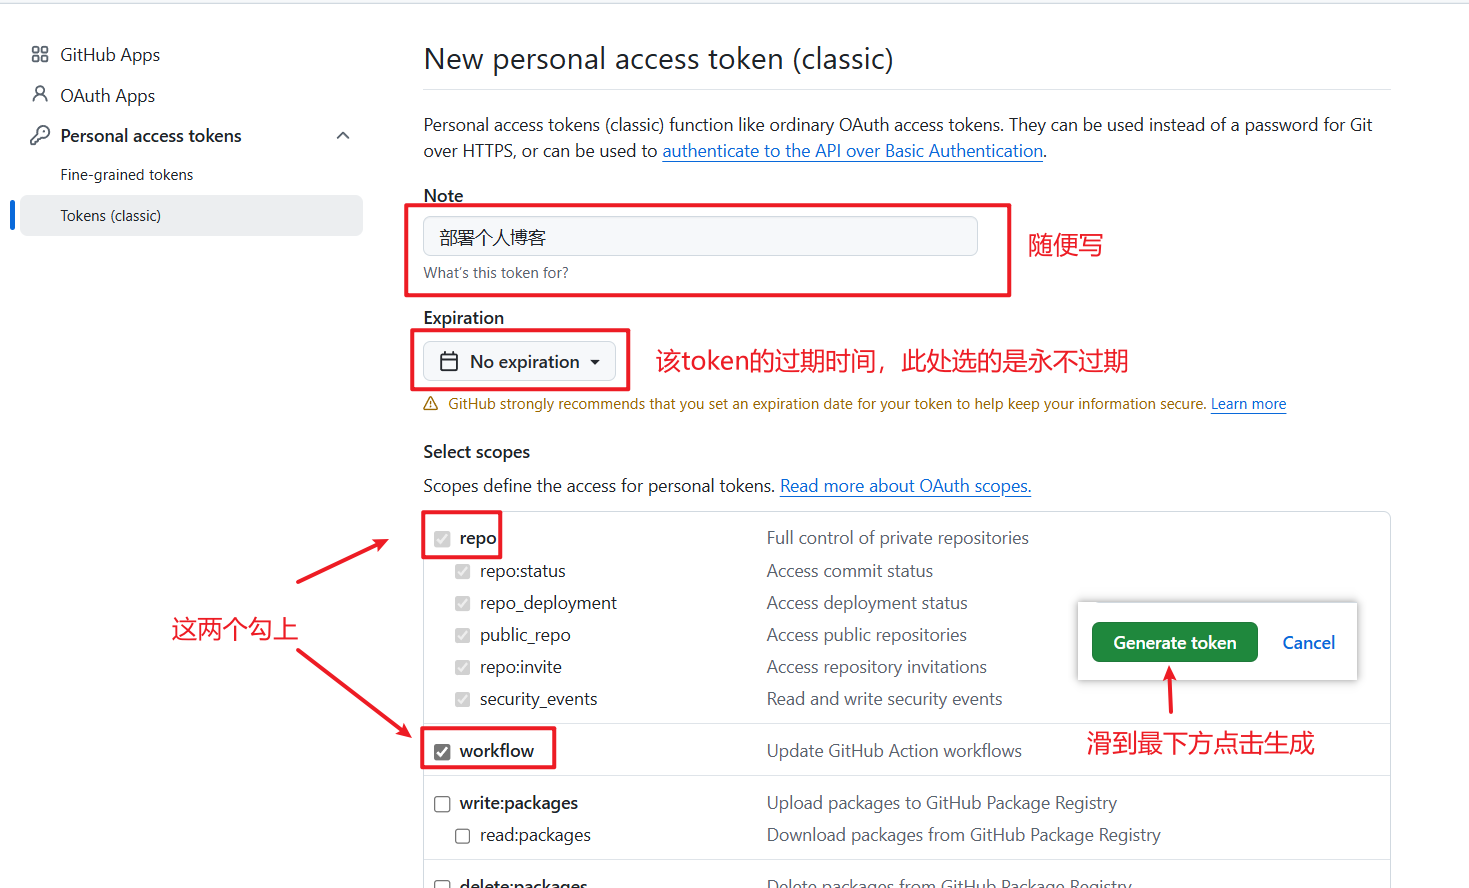
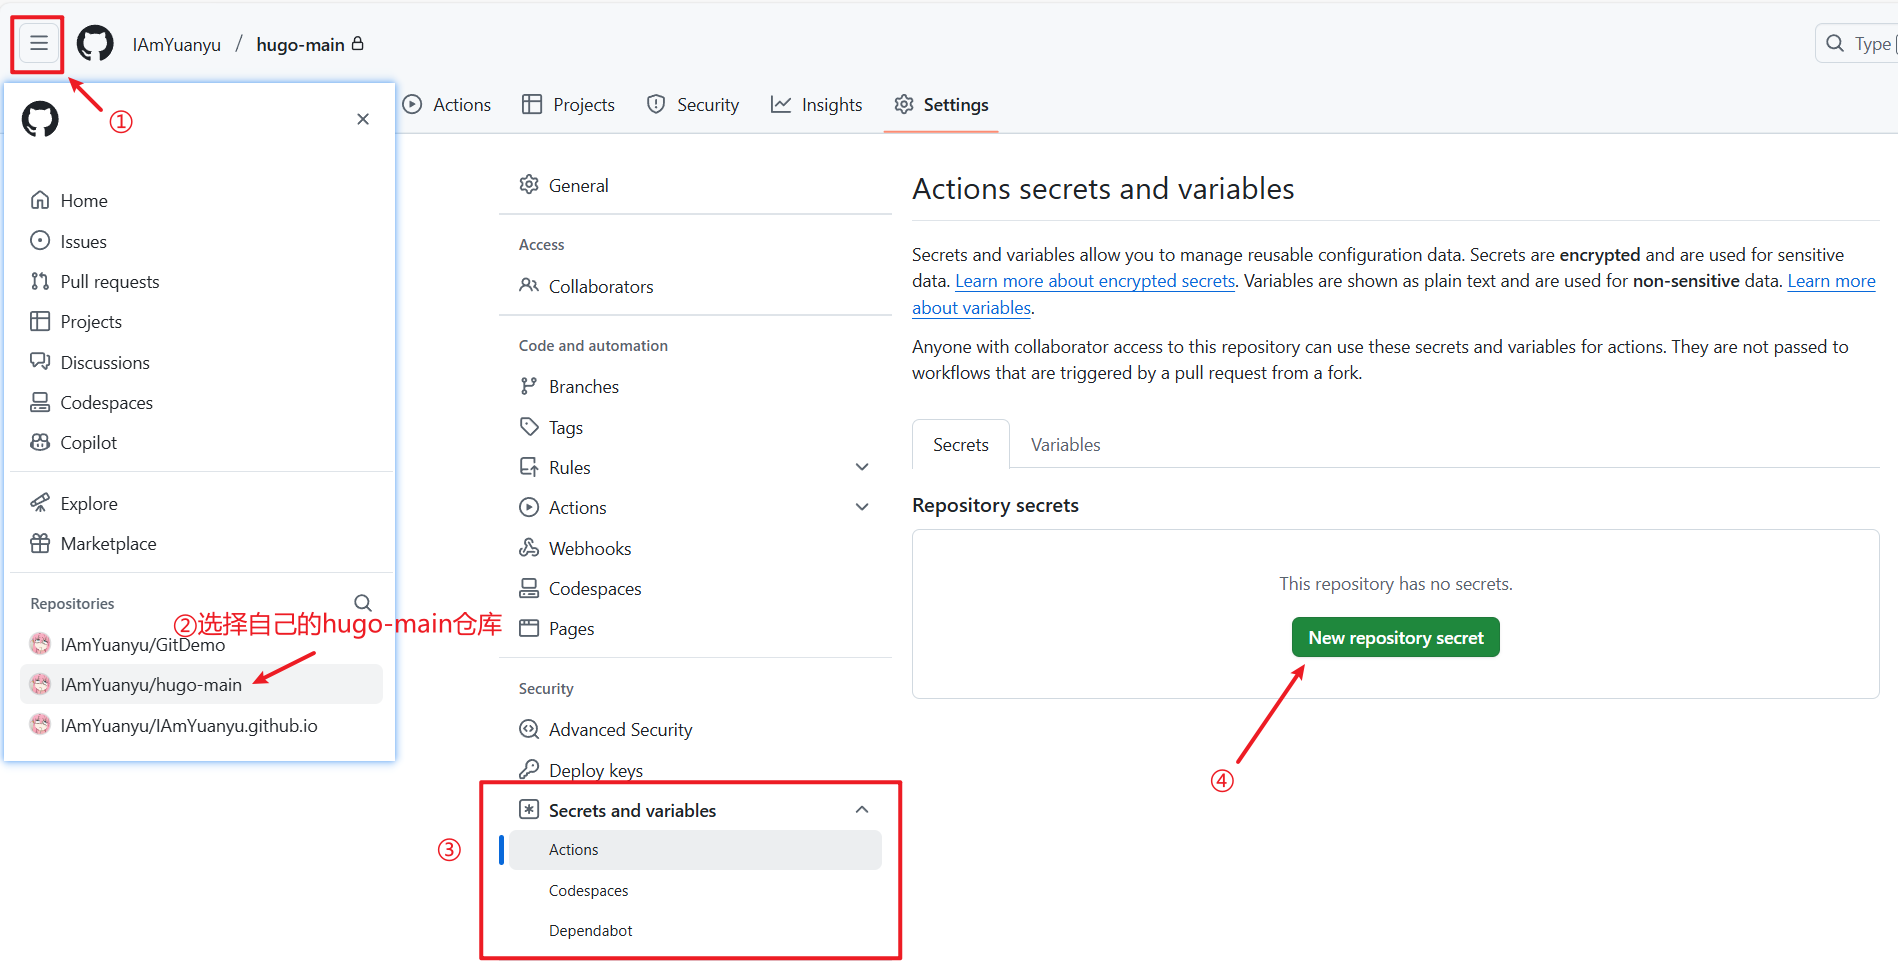
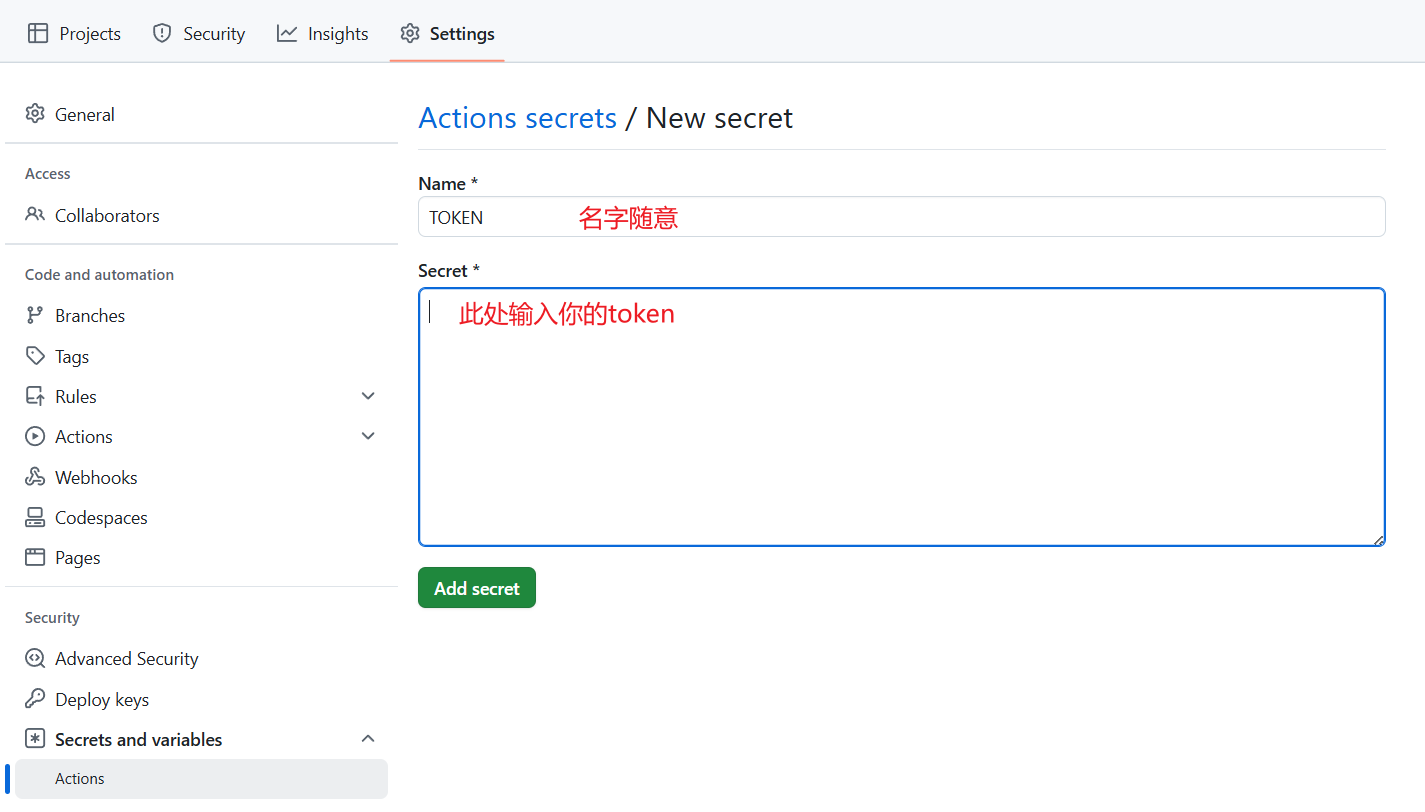
42.将token配置为hugo-main仓库的环境变量
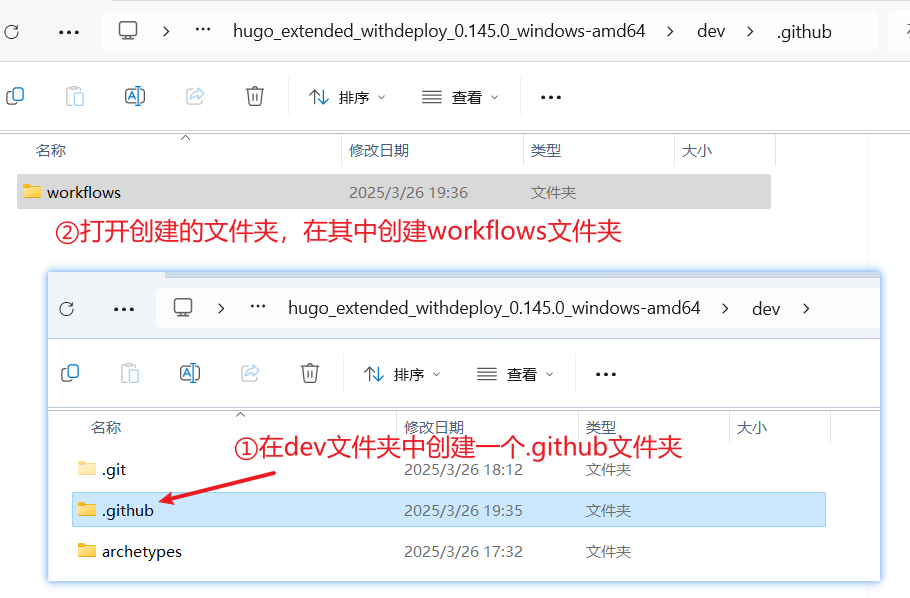
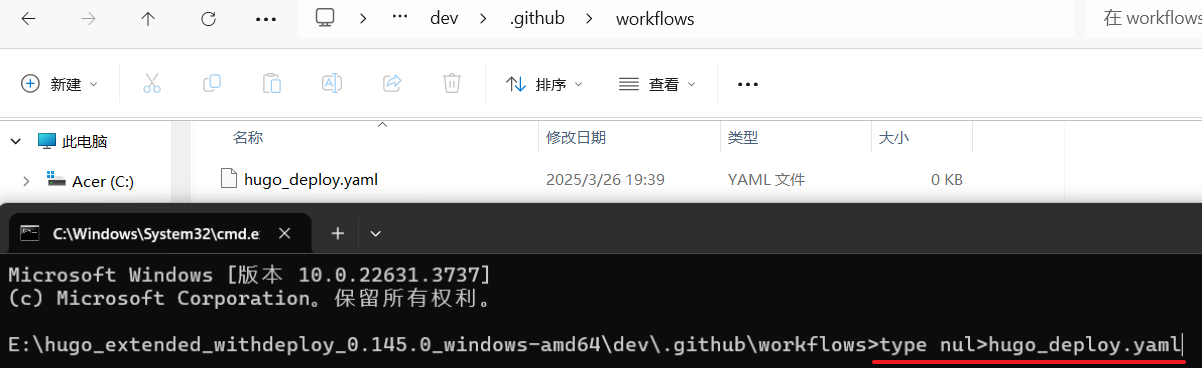
44.回到dev文件夹,创建.github/workflows/
45.打开workflows文件夹,创建一个随意取个名.yaml文件,此处叫hugo_deploy.yaml,不会创建可以用图中命令type nul>hugo_deploy.yaml
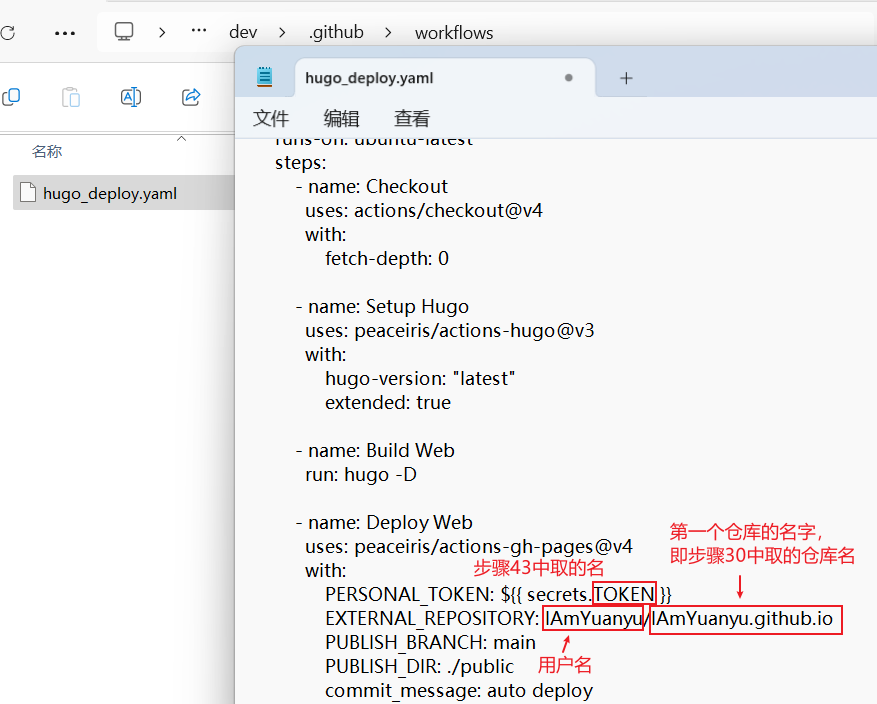
46.将下方内容赋值到创建的hugo_deploy.yaml中
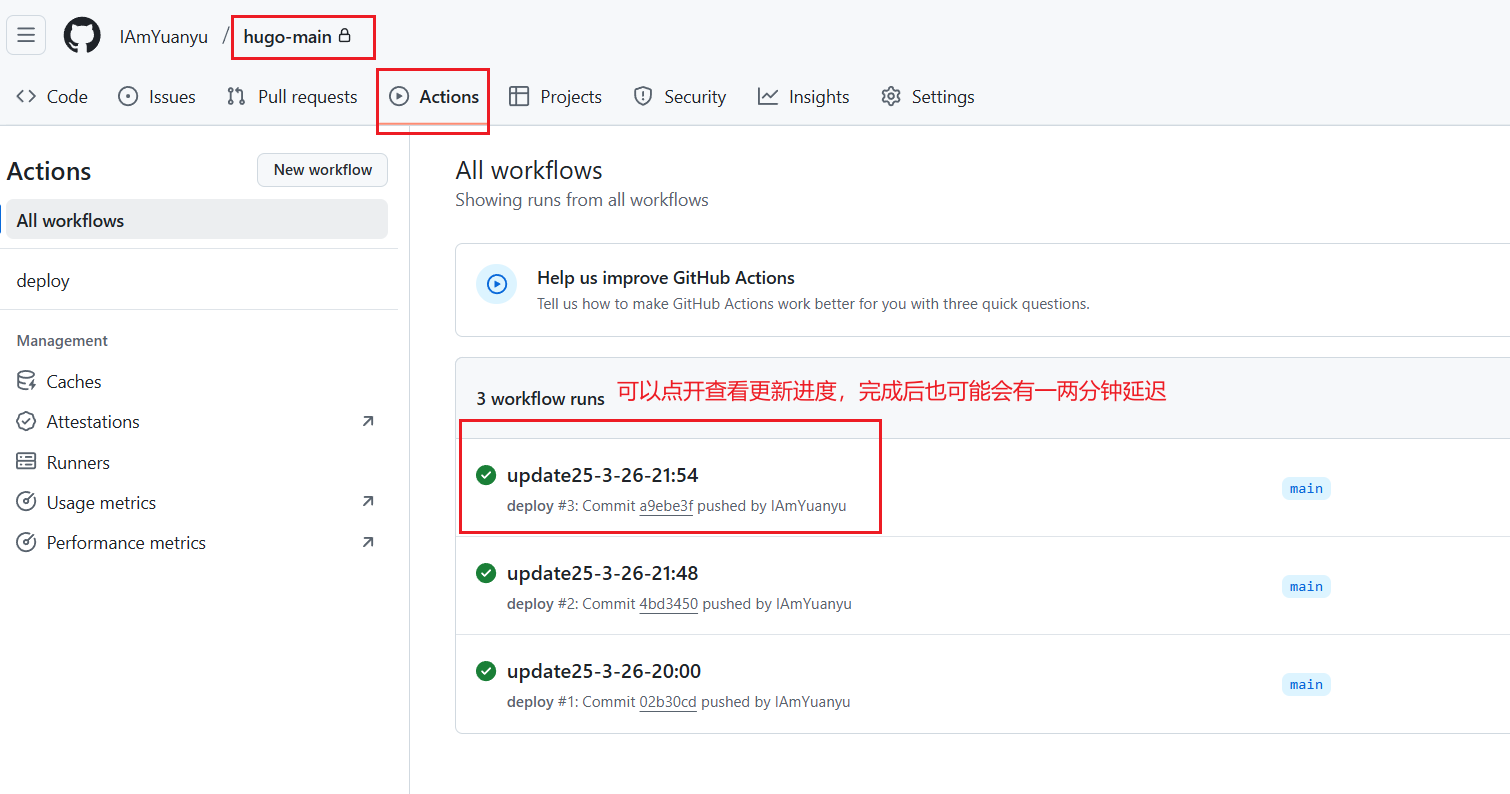
|
|
47.此时已完成了自动化部署。之后更新了代码,只要再次回到dev文件夹,打开cmd窗口,依次输入git add .、git commit -m "update25-3-26-20:00"(双引号内写什么无所谓)、git push后,页面就会更新(hugo-main编译完成后可能会有一点延迟,可以先等一两分钟看看)